
A recent segment on our local television news highlighted the incredible migration patterns of hummingbirds, noting that this season marks the beginning of their massive southward journey toward Mexico for the winter months. Picture these delicate, minuscule birds embarking on an epic voyage from regions as distant as Canada all the way to Mexico and parts of Central America. Such an extraordinary distance would challenge even a person traveling by automobile! The report explained that these tiny travelers initiate their migration as temperatures drop and natural food sources like flowers start to dwindle. Experts recommend keeping hummingbird feeders generously filled during this period, providing the essential high-energy fuel these remarkable creatures require to complete their demanding trip successfully.

Lacking a hummingbird feeder of my own, I decided to visit a nearby bird supply store, though similar options might be available at local hardware retailers. The budget-friendly feeders on display were mostly made of plastic and lacked any real aesthetic charm. In contrast, the more elegant models featuring glass bottles came with a hefty price tag. As I examined the various options, it struck me that crafting my own version of a DIY glass bottle hummingbird feeder would not only save money but also allow me to design something far more visually striking and personalized.

Step-by-Step Guide to Crafting a Stunning DIY Glass Bottle Hummingbird Feeder
Creating your own DIY glass bottle hummingbird feeder doesn’t call for elaborate tools or materials. Simply rummage through your recycling bin or refrigerator for that half-finished soda, sparkling water, or wine bottle gathering dust. I’ve compiled a complete list of required supplies to guide you through the process effortlessly.

Required Materials
- Glass or plastic bottle, such as repurposed wine bottles, sparkling water containers, glass soda bottles, or even vintage glass vessels
- Copper wire in both thick and thin gauges for structural support and decorative elements
- Hummingbird feeder spout designed specifically for nectar dispensing
Detailed Assembly Instructions
To assist with visualization, a short instructional video demonstrates the entire construction process for this homemade bottle hummingbird feeder. What follows are straightforward, easy-to-follow steps to replicate the design at home.
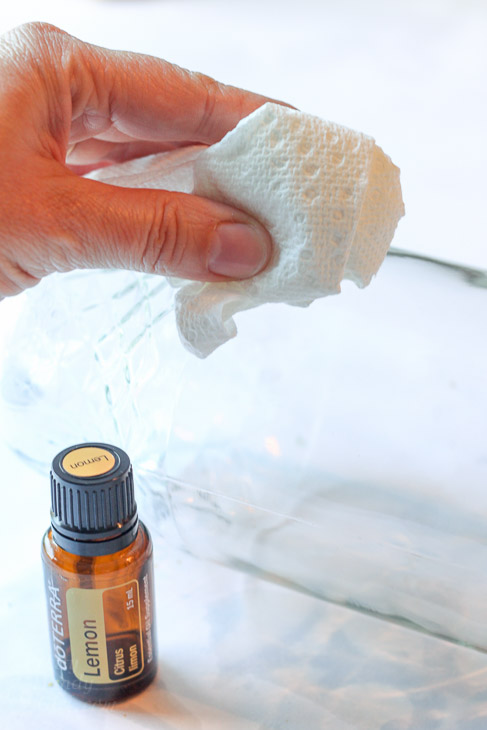
- Thoroughly clean the selected bottle using warm soapy water to eliminate any residues. Carefully peel off all labels; for stubborn adhesives, a reliable method involves applying a citrus-based remover to loosen the glue effectively.
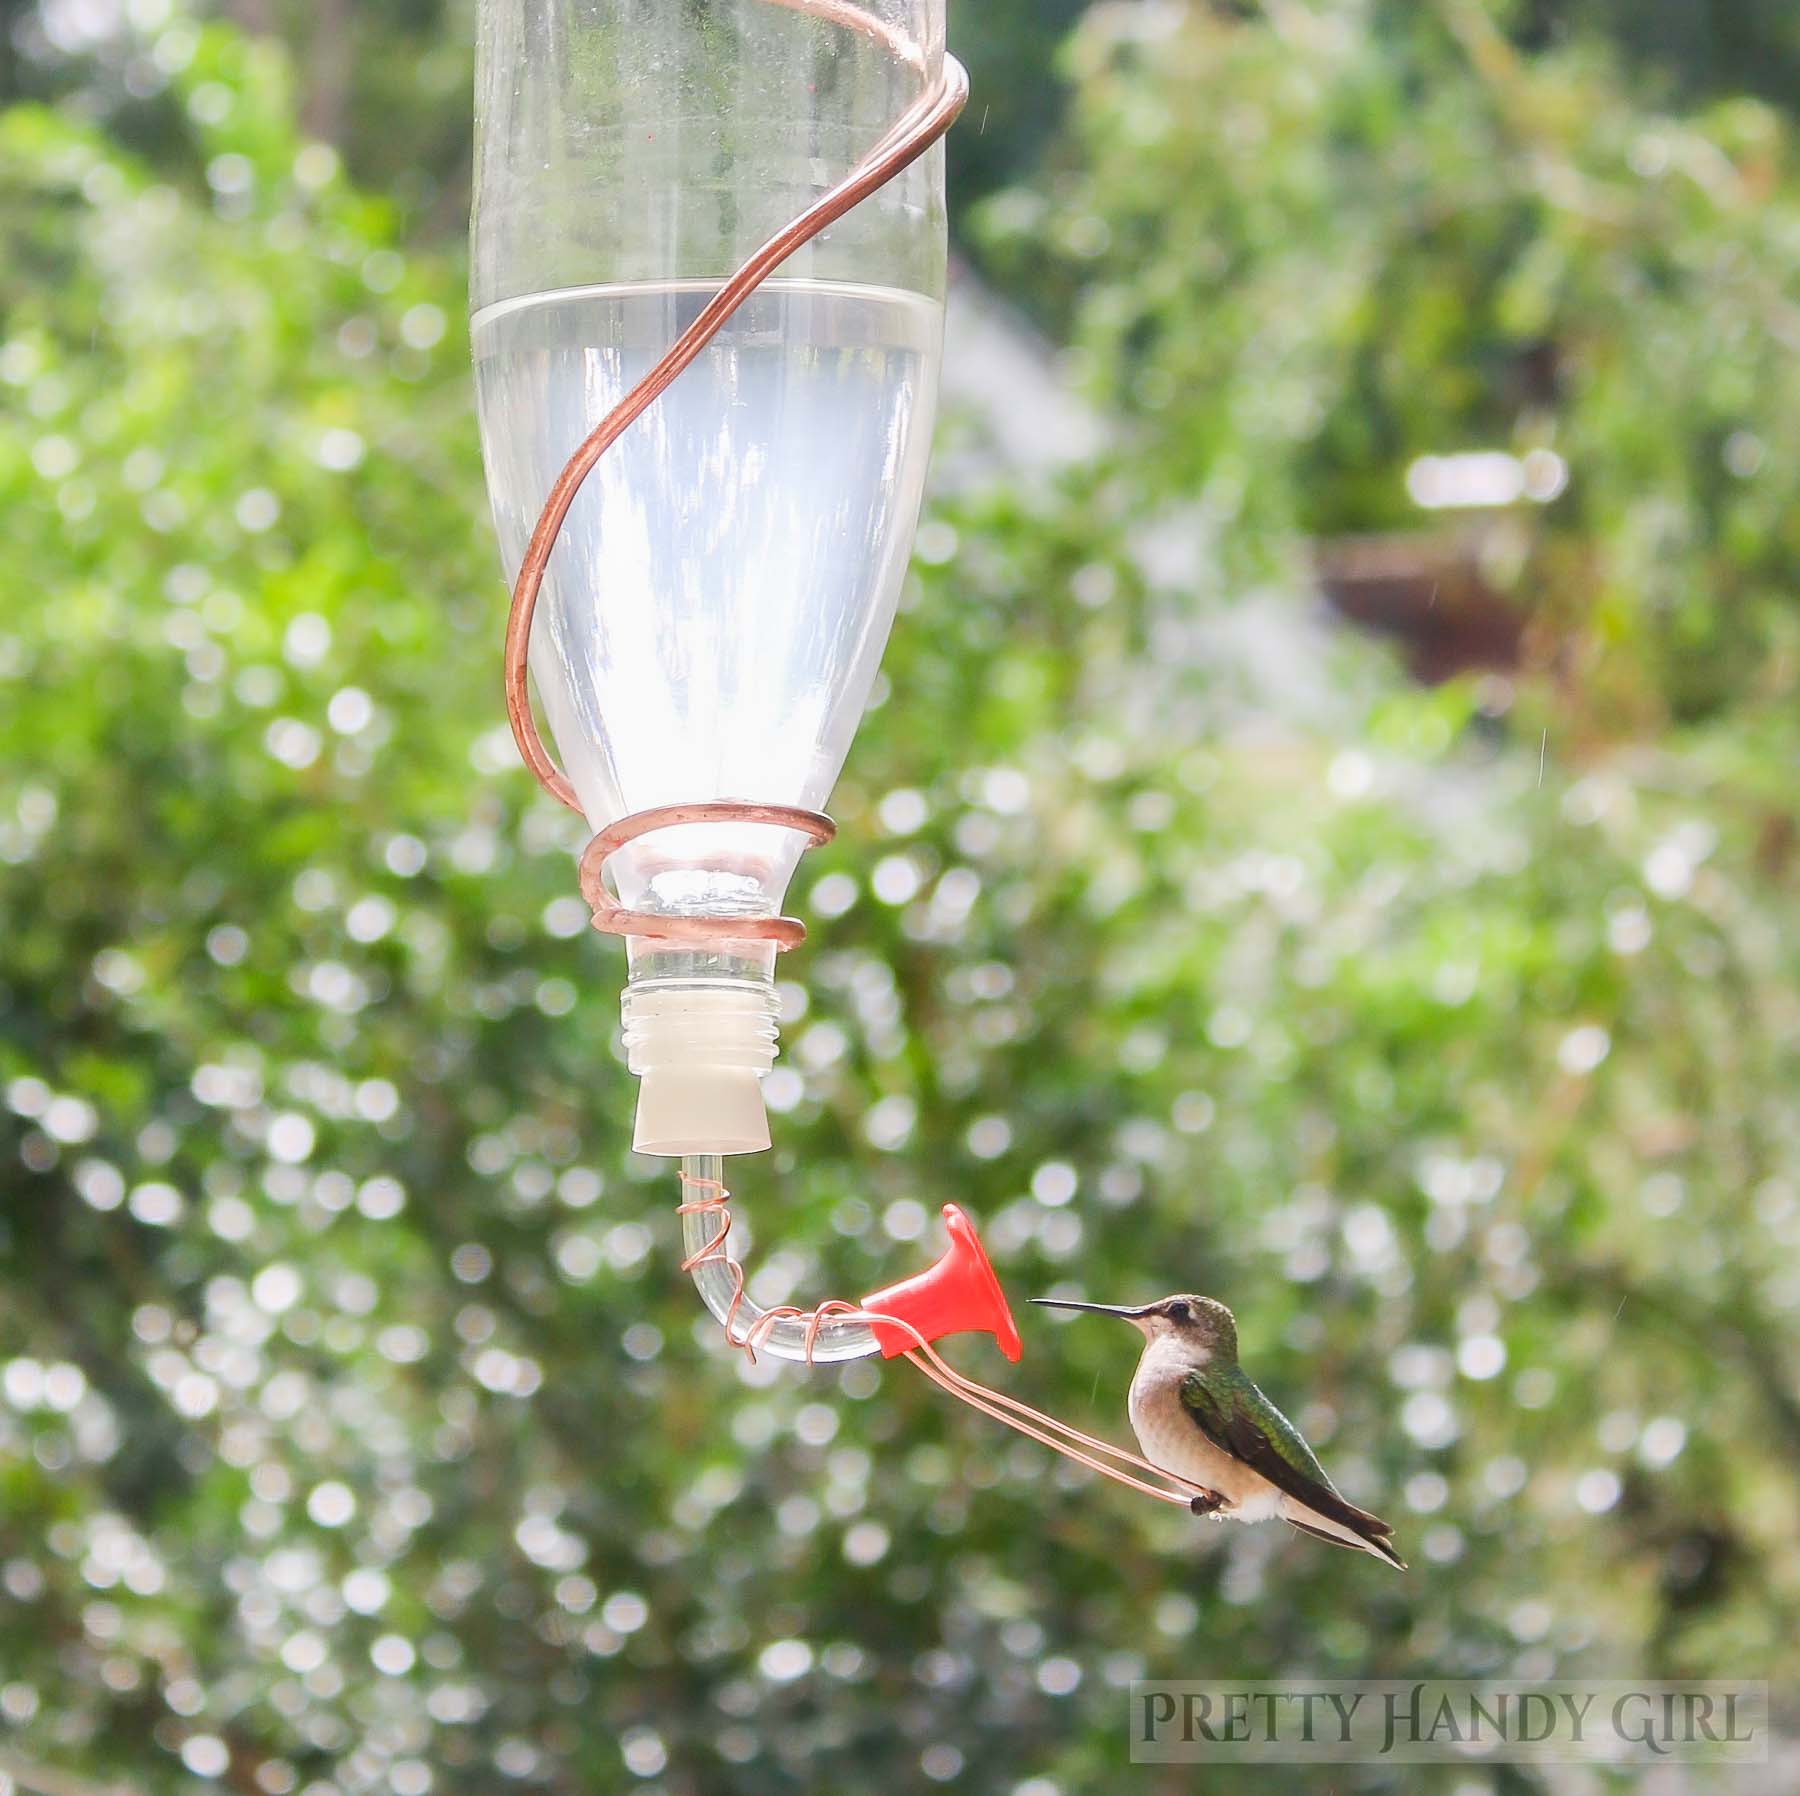
- Select a thick-gauge copper wire to create the hanging mechanism for the glass bottle. Begin by forming a gentle curve at one end of the wire and maneuver it securely around the bottle’s neck. For an even snugger grip, employ a clamp or pliers to press the wire firmly against the glass surface.
- Continue shaping the wire by wrapping it upward along the bottle’s contours, rotating the bottle periodically as you twist and bend to achieve a uniform wrap. Conclude the wrapping at the bottle’s base.
- At what will become the top of the feeder (originally the bottle’s bottom), craft a large loop followed by an ornate curly tail to serve as a sturdy hanging hook.
For ease of use, I sourced affordable hummingbird feeder spouts online, complete with a vibrant red plastic flower base and precisely sized feeding ports that prevent leaks while attracting birds.
Optional Enhancement: Prior to inserting the spout into the bottle neck, I adorned it by coiling thinner-gauge copper wire around the tube and fashioning a delicate loop beneath the flower petal. This addition forms a convenient perch, enabling hummingbirds to alight comfortably rather than hover continuously during feeding. Research indicates that feeders equipped with perches draw more frequent visits from these birds, encouraging them to linger and consume more nectar.

With these steps completed, you’ve successfully assembled a charming homemade hummingbird feeder using an elegant glass bottle and artistic copper wire accents. The result is both functional and decorative, perfect for any garden or patio setting.
Preparing Hummingbird Nectar
Now that your feeder is ready, prepare a fresh batch of nectar using this simple recipe: Combine four parts water with one part white granulated sugar. Heat the mixture in a saucepan until it reaches a rolling boil, then allow it to simmer gently for about five minutes. Remove from heat and let it cool completely to room temperature before use. This nectar solution can be safely stored in the refrigerator for up to five days, ensuring a steady supply for your feathered guests.

Once filled with the cooled nectar, suspend the feeder near a window for optimal viewing pleasure as you observe the dazzling hummingbirds flitting about and quenching their thirst right outside your home.
It wasn’t long before the hummingbirds discovered and began regularly visiting my newly hung feeder, turning the area into a lively spectacle of iridescent wings and rapid darting movements.

Tips for Managing Bees at Your Hummingbird Feeder
To share candidly, after several days of delighting in the hummingbirds’ presence, an unanticipated visitor appeared at the feeder: a honeybee. Initially, just one or two bees showed up, which didn’t seem problematic. However, word must have spread quickly within the hive, as a substantial swarm soon overtook the feeding ports. If you have effective strategies for discouraging bees while preserving access for hummingbirds, please share your insights in the comments.

In response, I’ve acquired additional feeder spouts with designs featuring multiple flower ports in hopes that they drip less and prove less enticing to insects. These include options with three-flower and two-flower configurations. I’ll update with results on their performance in deterring bees while maintaining appeal for the birds. In the interim, relish the enchanting visits from your hummingbirds and the joy they bring to your outdoor space.