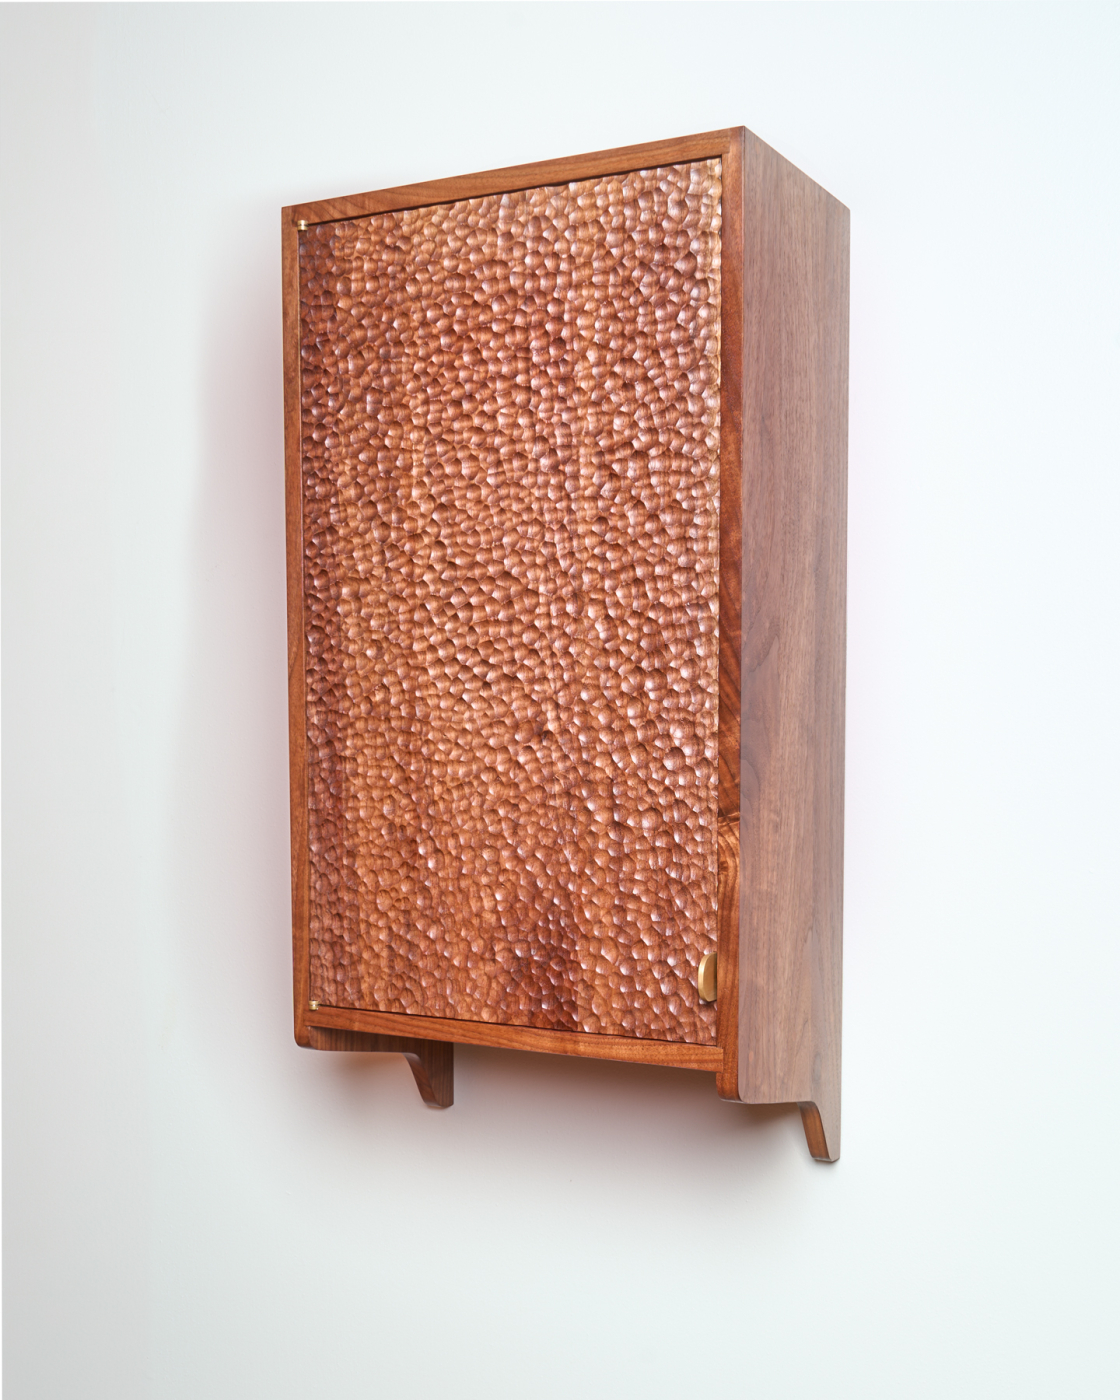
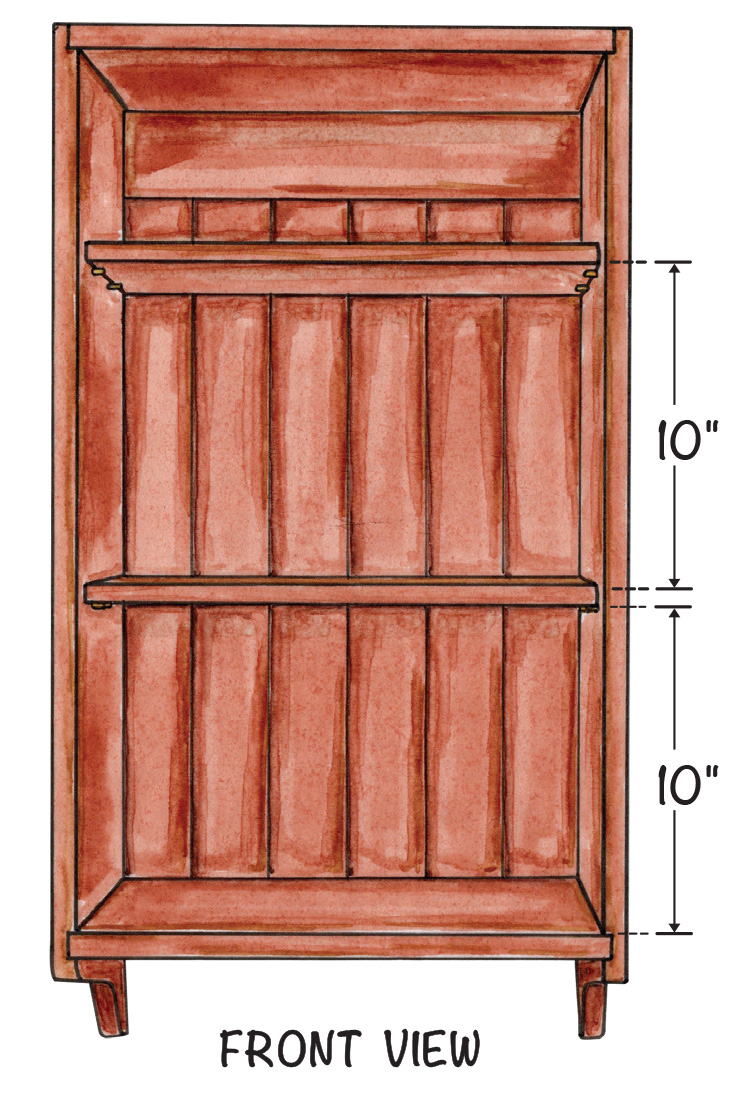
This uncomplicated wall cabinet gains sophistication through carefully considered design elements that elevate its overall appeal.
Design Evolution and Creative Inspiration
At its core, a wall cabinet consists of little more than a basic enclosure featuring a single door. Nevertheless, this fundamental structure offers abundant room for innovative expression and artistic flair. The concept behind this particular piece developed gradually through numerous sketches in my notebook. However, once I began the actual construction process, I found myself revising nearly every aspect of the original plan. What prompted these changes? Some adjustments stemmed from practical considerations during fabrication, but the primary driver was the unexpected inspiration provided by the wood itself as I started shaping the components. Certain foundational elements persisted throughout—I remained committed to using walnut as the primary material, and the notion of applying texture to the door drew inspiration from a cabinet crafted by Lara Mays, although the specific textural technique ultimately differed from my initial vision. Additional refinements emerged later, such as the elegant contour of the decorative cutout on the sides, which borrows directly from a classic Sam Maloof design motif.
Essential Hardware Components
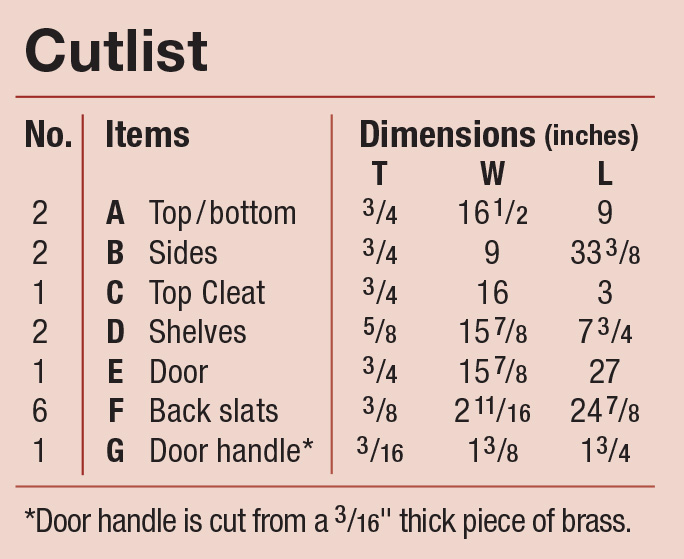
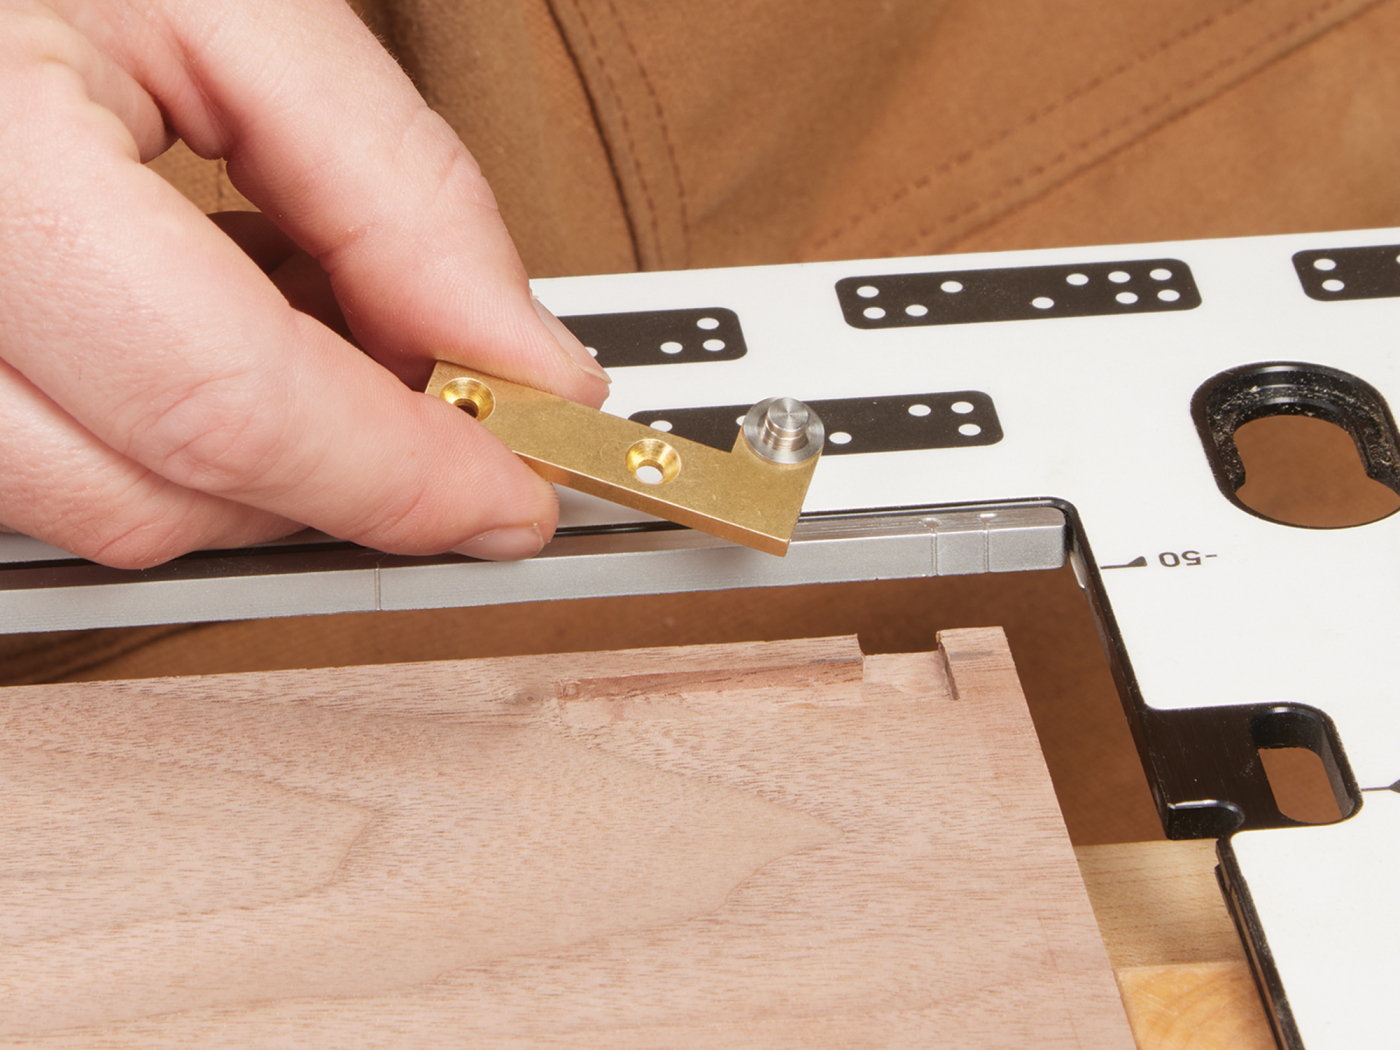
Key hardware items include an adjustable ball catch, a pair of offset pivot hinges measuring 1-3/4” x 3/8” x 1/8” extended, and eight shelf pins in a brass finish.
Straightforward Joinery Approach
Drawing further inspiration from Sam Maloof’s philosophy, as detailed in his autobiography, the joinery for this cabinet emphasizes practicality and simplicity. While traditional dowels could have been employed, they would introduce unnecessary complications without meaningful benefits. Instead, the chosen method utilizes screws concealed beneath decorative plugs, mirroring the technique Maloof applied to his renowned chairs. The top and bottom panels are securely seated within a rabbet and dado configuration, executed through a reliable and error-resistant process that prioritizes ease of execution.
Preparing the Walnut Stock
Given the modest dimensions of this wall cabinet, sourcing walnut boards wide enough to yield all case components without glue-ups proved straightforward. That said, opting for the simplest path isn’t always optimal. There’s ongoing discussion in woodworking circles about whether alternating growth rings in glued panels truly enhances stability against warping. To address this, I systematically divided my rough stock into uniform strips, then meticulously paired them to form visually striking panels. My objective was to prioritize straight grain patterns wherever feasible while minimizing the inclusion of sapwood in the primary panels—reserving it instead for the back assembly later on.
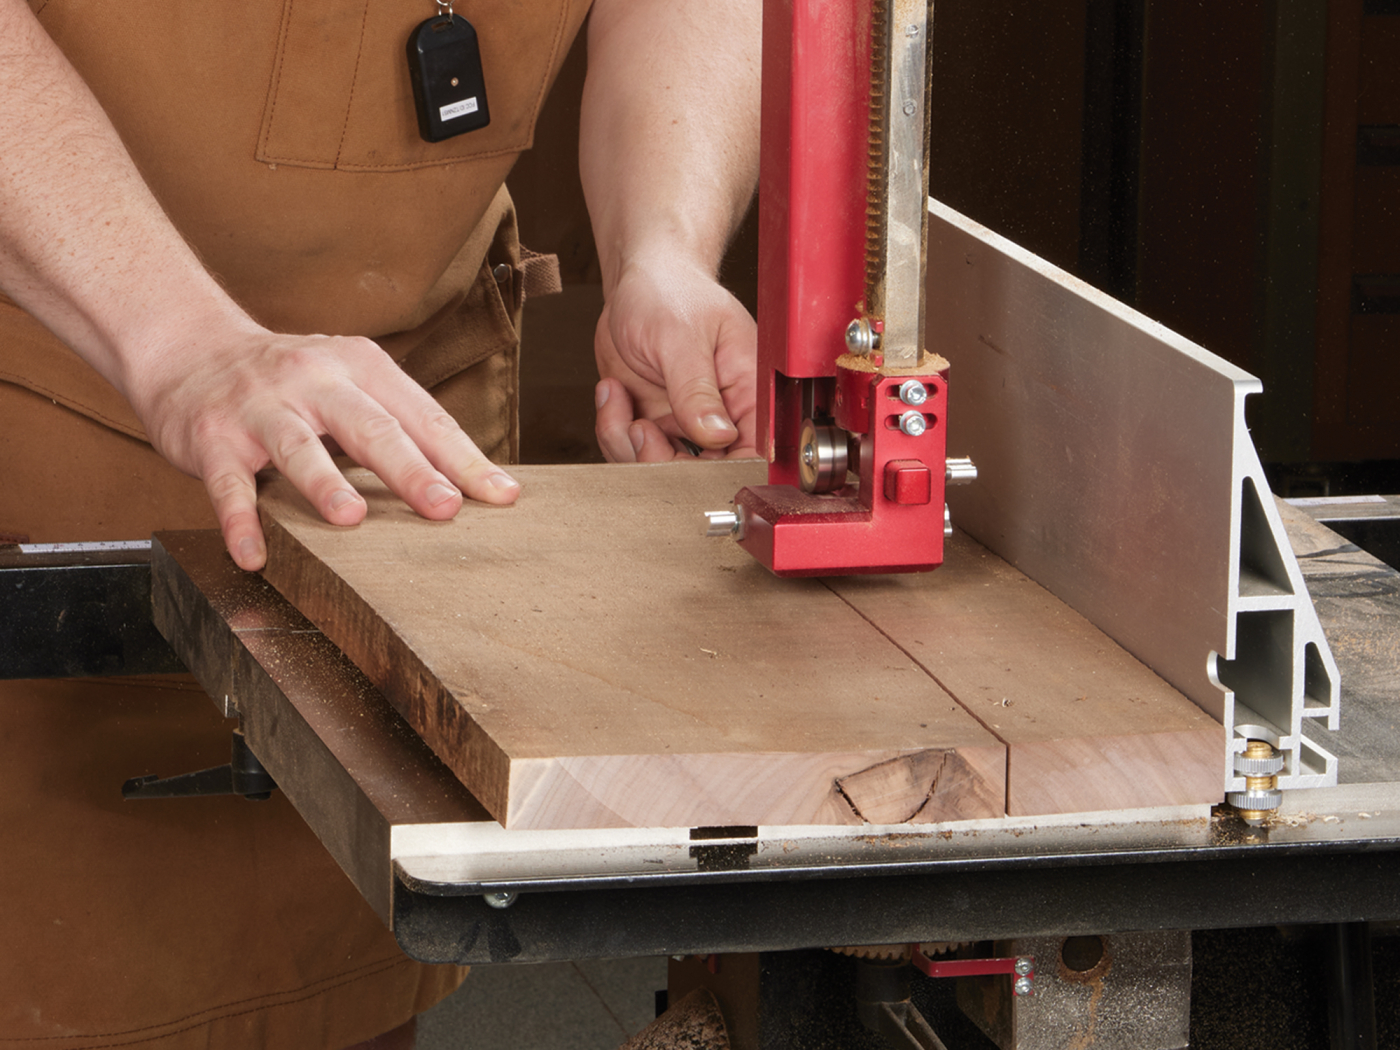
The stock preparation sequence unfolds as illustrated in the accompanying images. Begin by using the bandsaw to rough-rip the boards to approximate widths. This tool excels at disassembling uneven rough lumber, minimizing the risk of blade binding that could occur with a tablesaw on irregular surfaces.
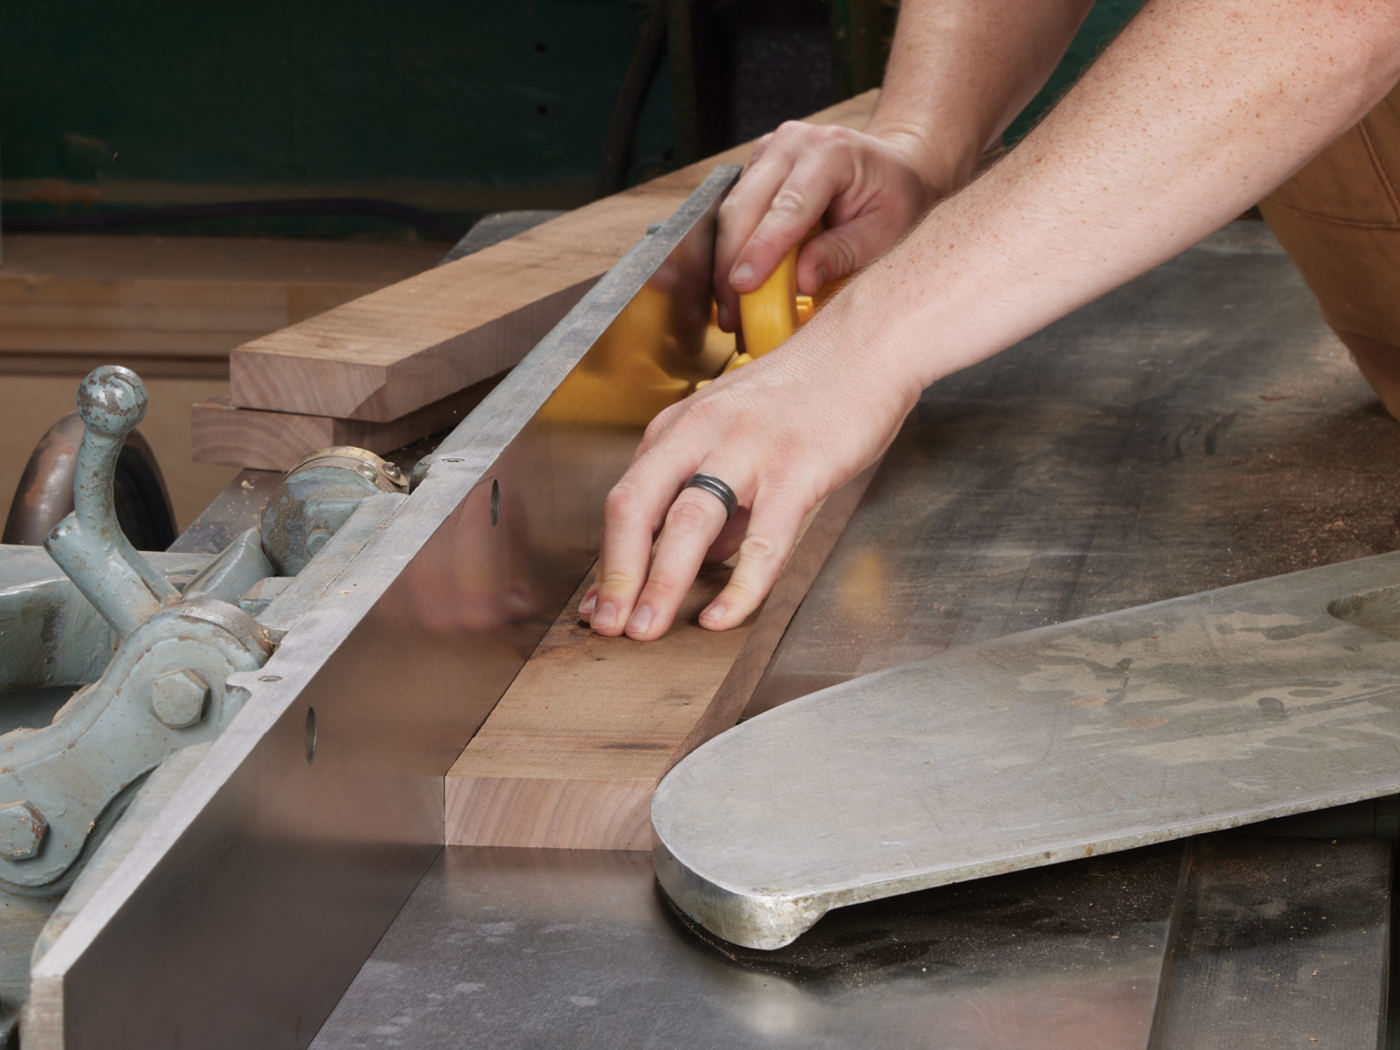
Next, joint one face and one edge on each strip to establish a clean, flat reference surface. While a massive 16-inch jointer isn’t essential, it certainly adds enjoyment to the process.
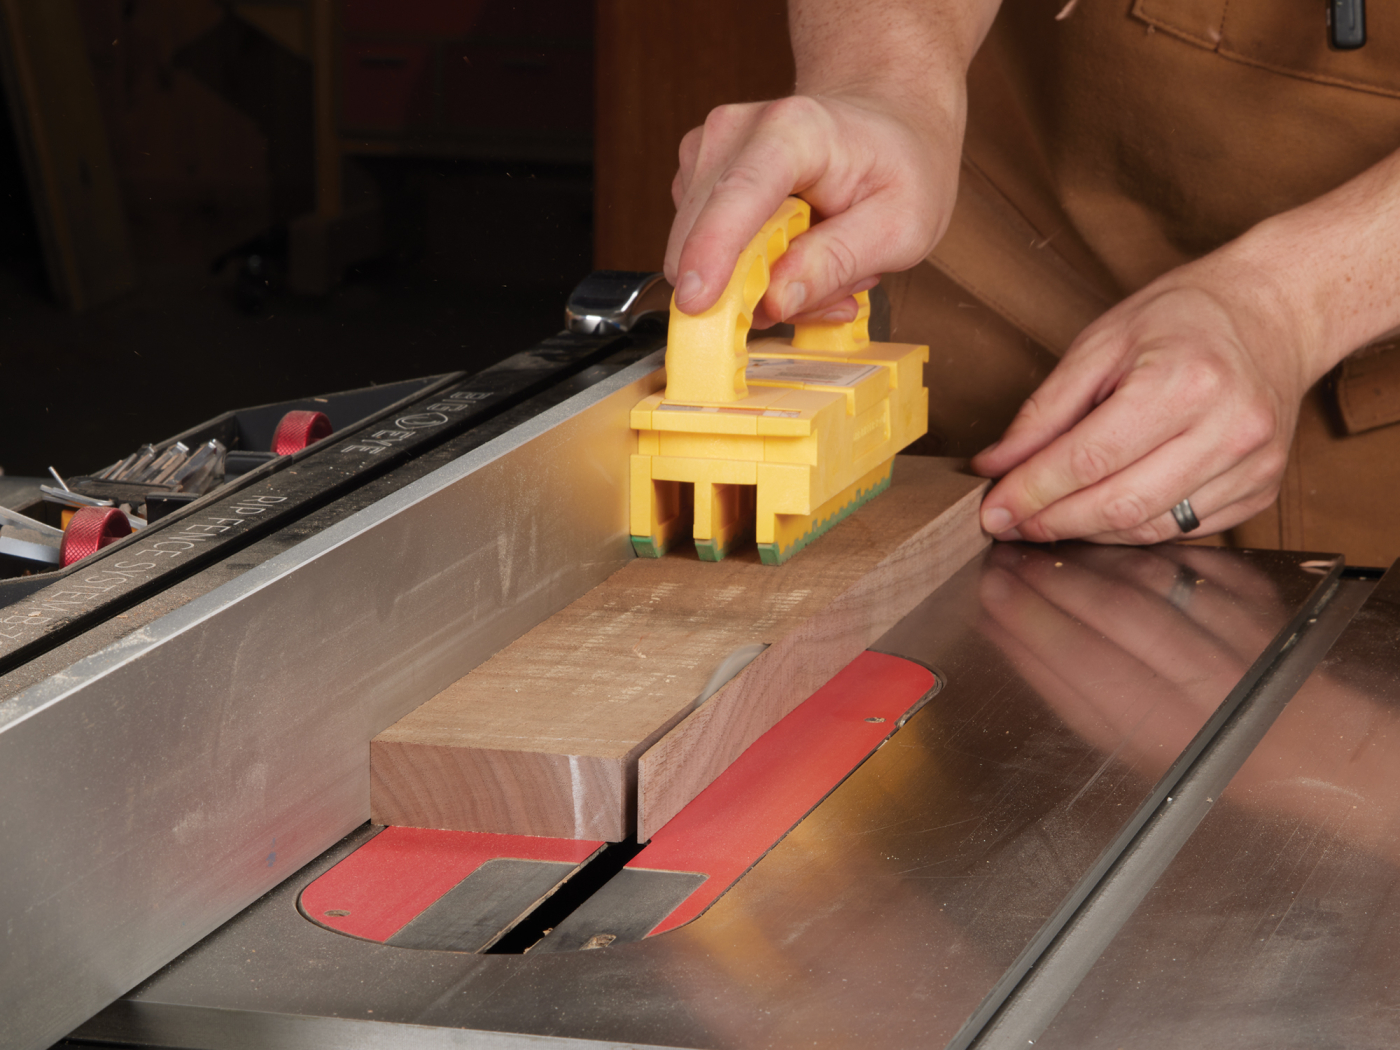
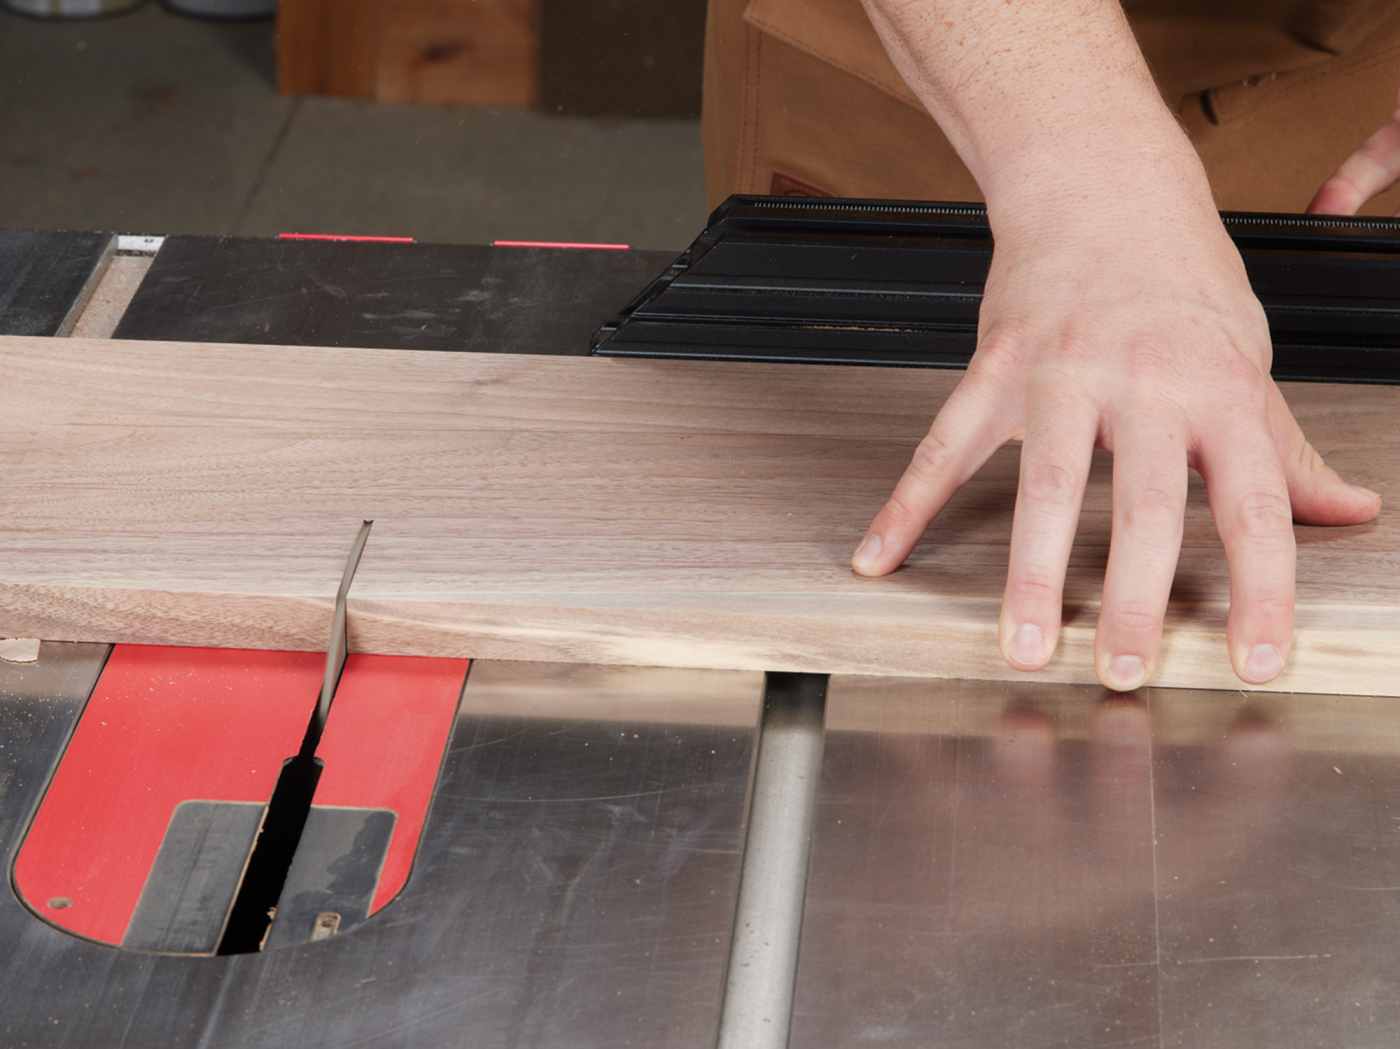
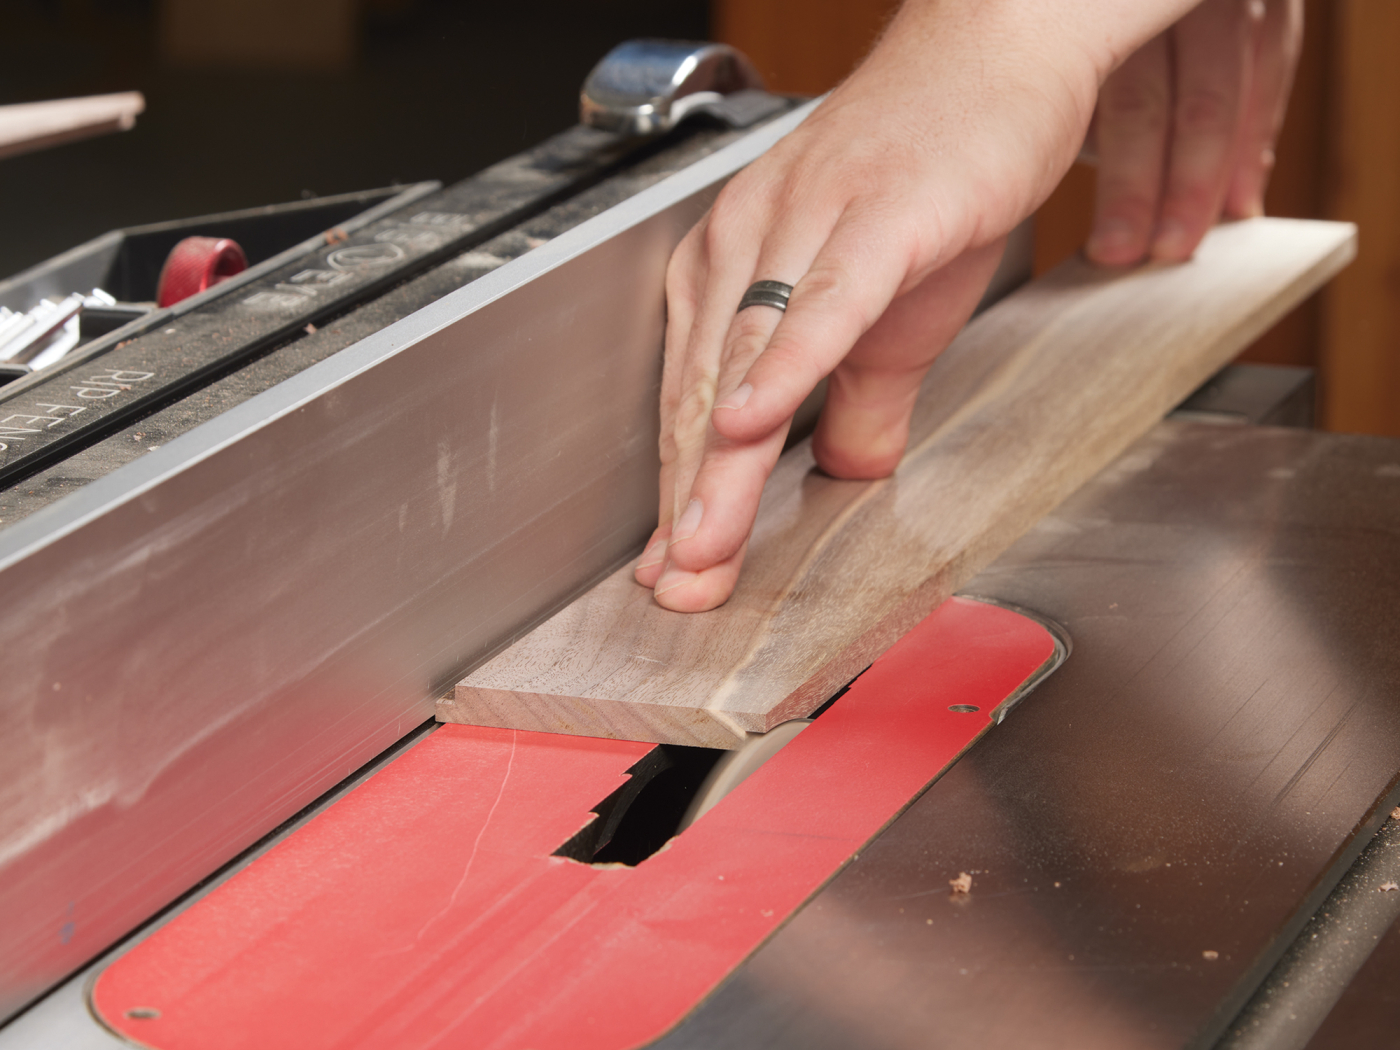
Transfer the prepared pieces to the table saw for precise ripping to final widths. The aim is to produce panels composed of an even number of matched boards, each at the target dimension.
Grain Matching and Panel Glue-Up
With the individual boards now ready, the next phase involves recombining them into stable, aesthetically pleasing panels. Experiment with flipping, rotating, and rearranging the strips until the grain flows harmoniously. Use chalk marks to label matched sets, preventing mix-ups during glue-up. For this project, each of the top, bottom, and side panels consists of three carefully selected strips.
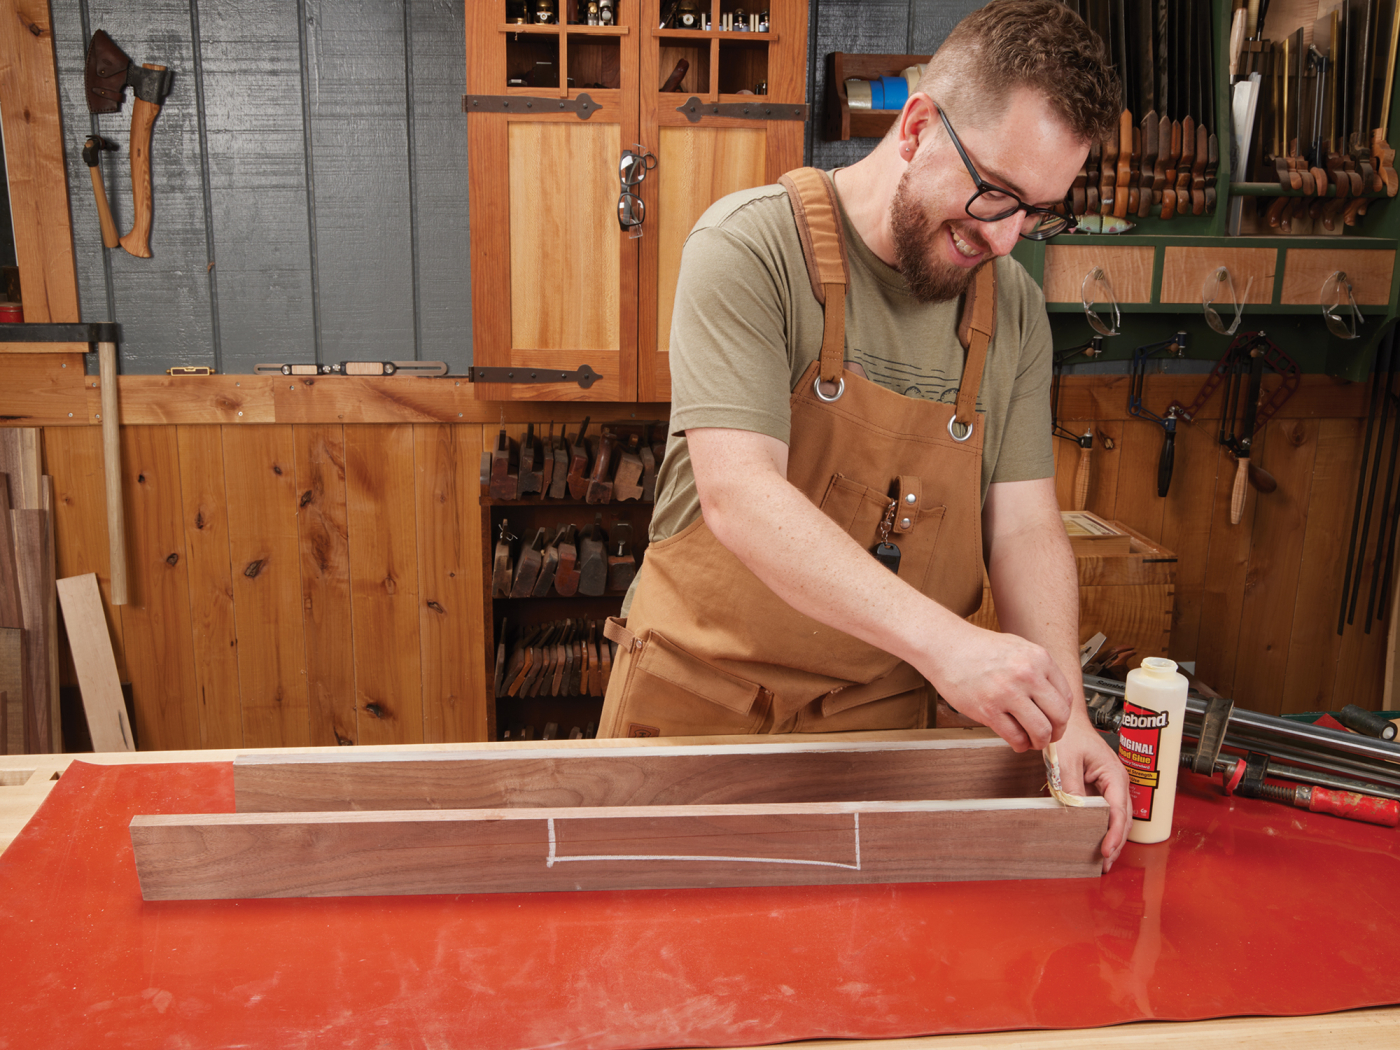
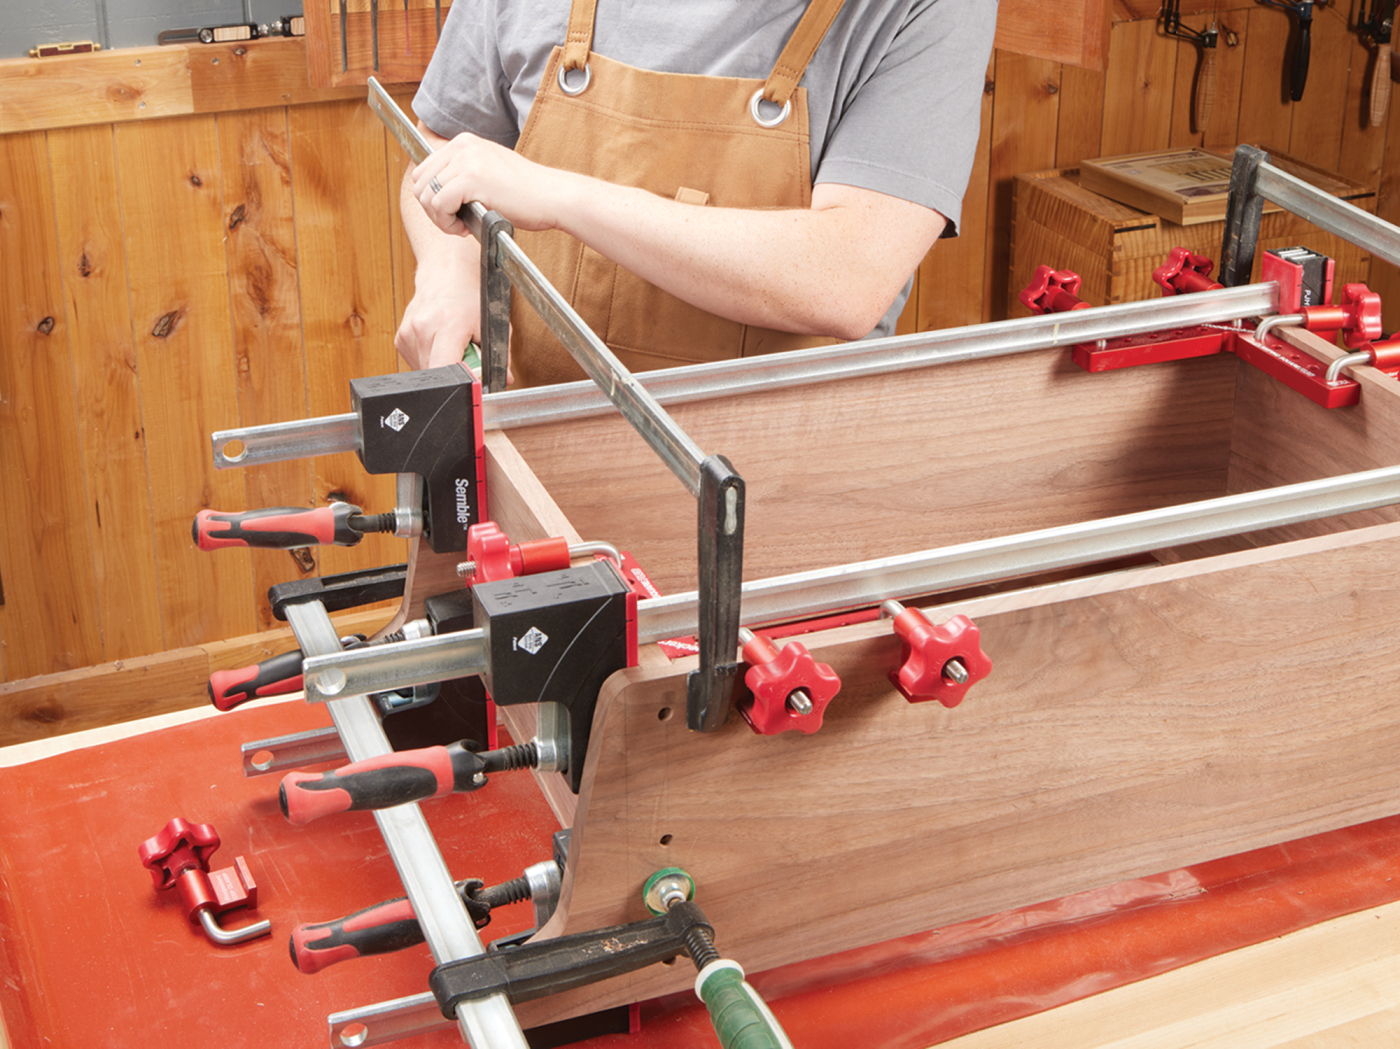
After investing effort in perfect grain matching, take a moment to inscribe a traditional carpenter’s triangle on the assembly for alignment reference.
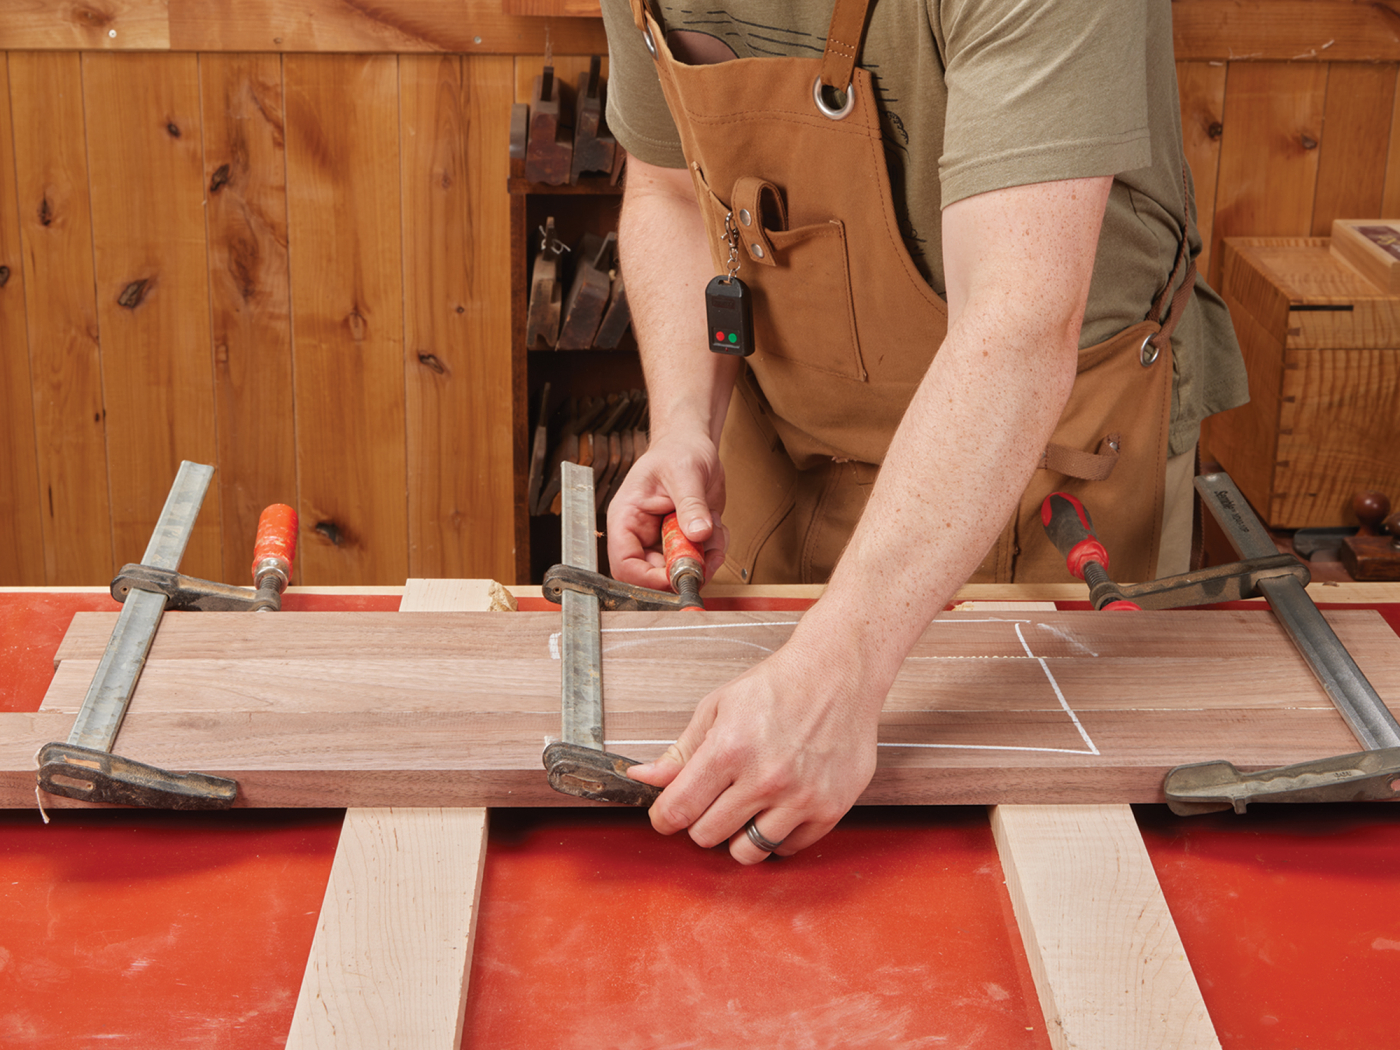
Employ three clamps strategically placed to distribute pressure evenly across the joints, ensuring tight seams without gaps.
Allow the glued panels several hours to cure fully. A precise glue-up typically requires only light planing to flatten the joints; if needed, a cautious pass through the planer can refine them further. Trim the panels to approximate final dimensions as shown.
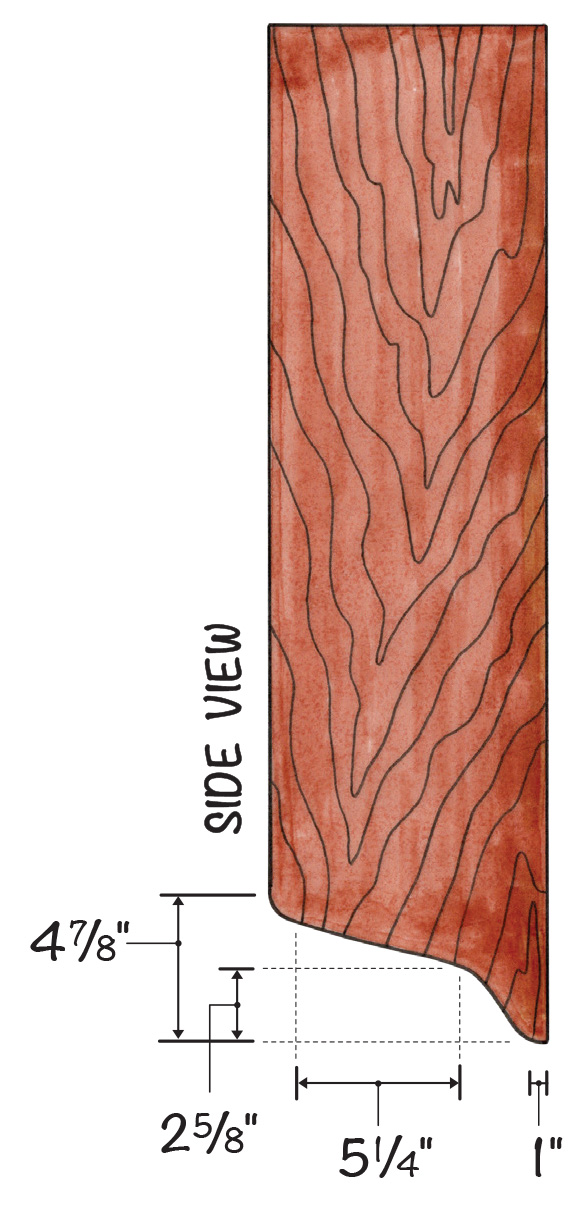
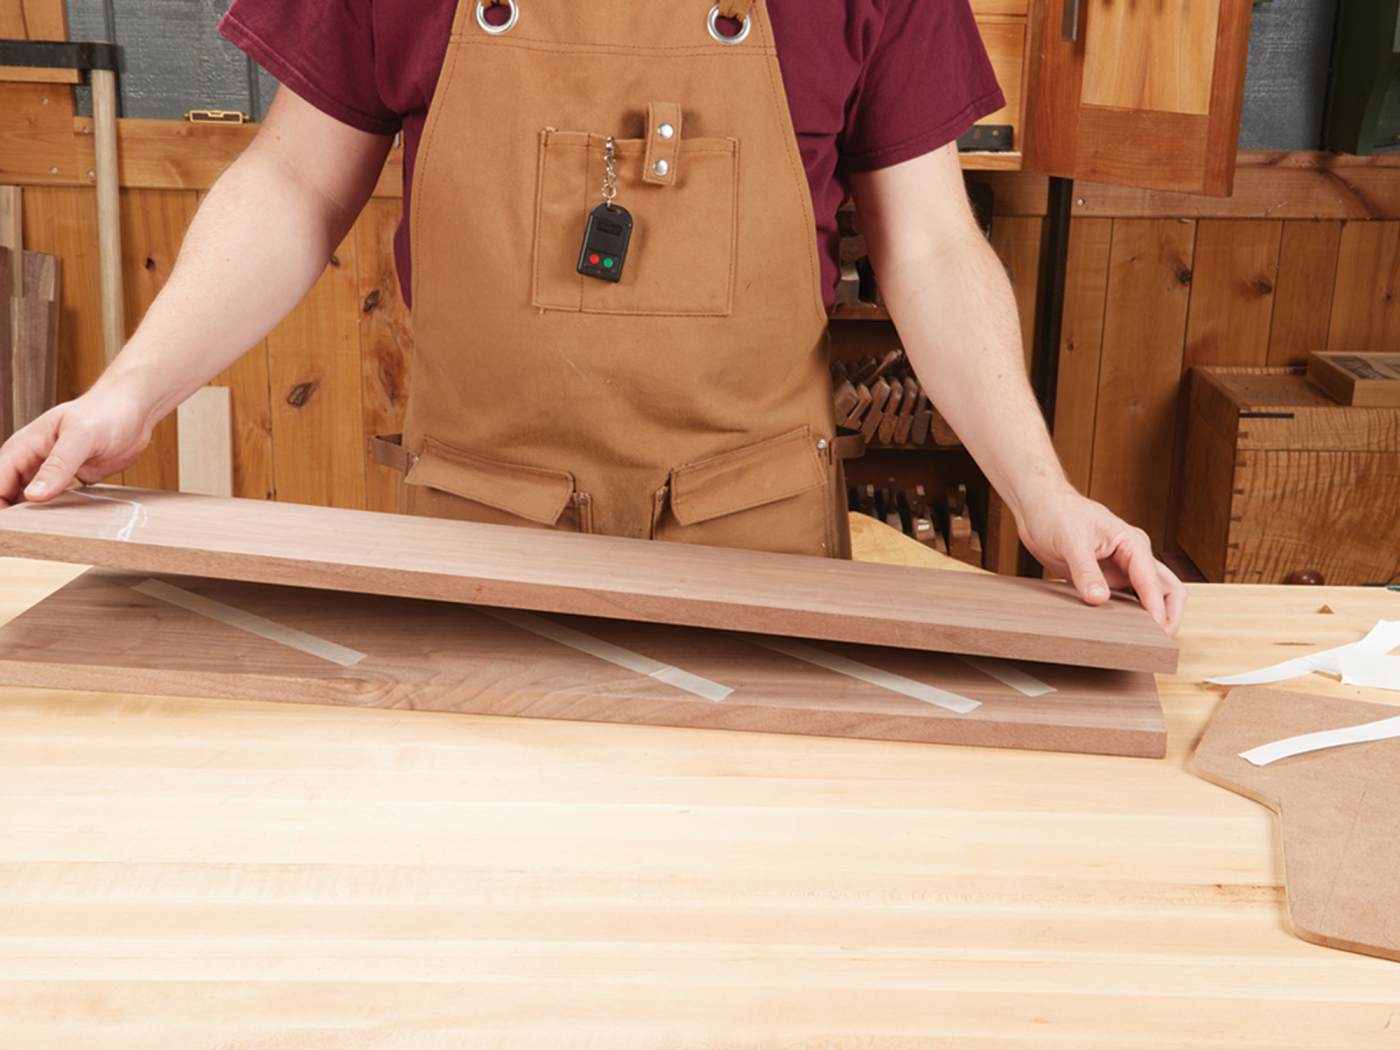
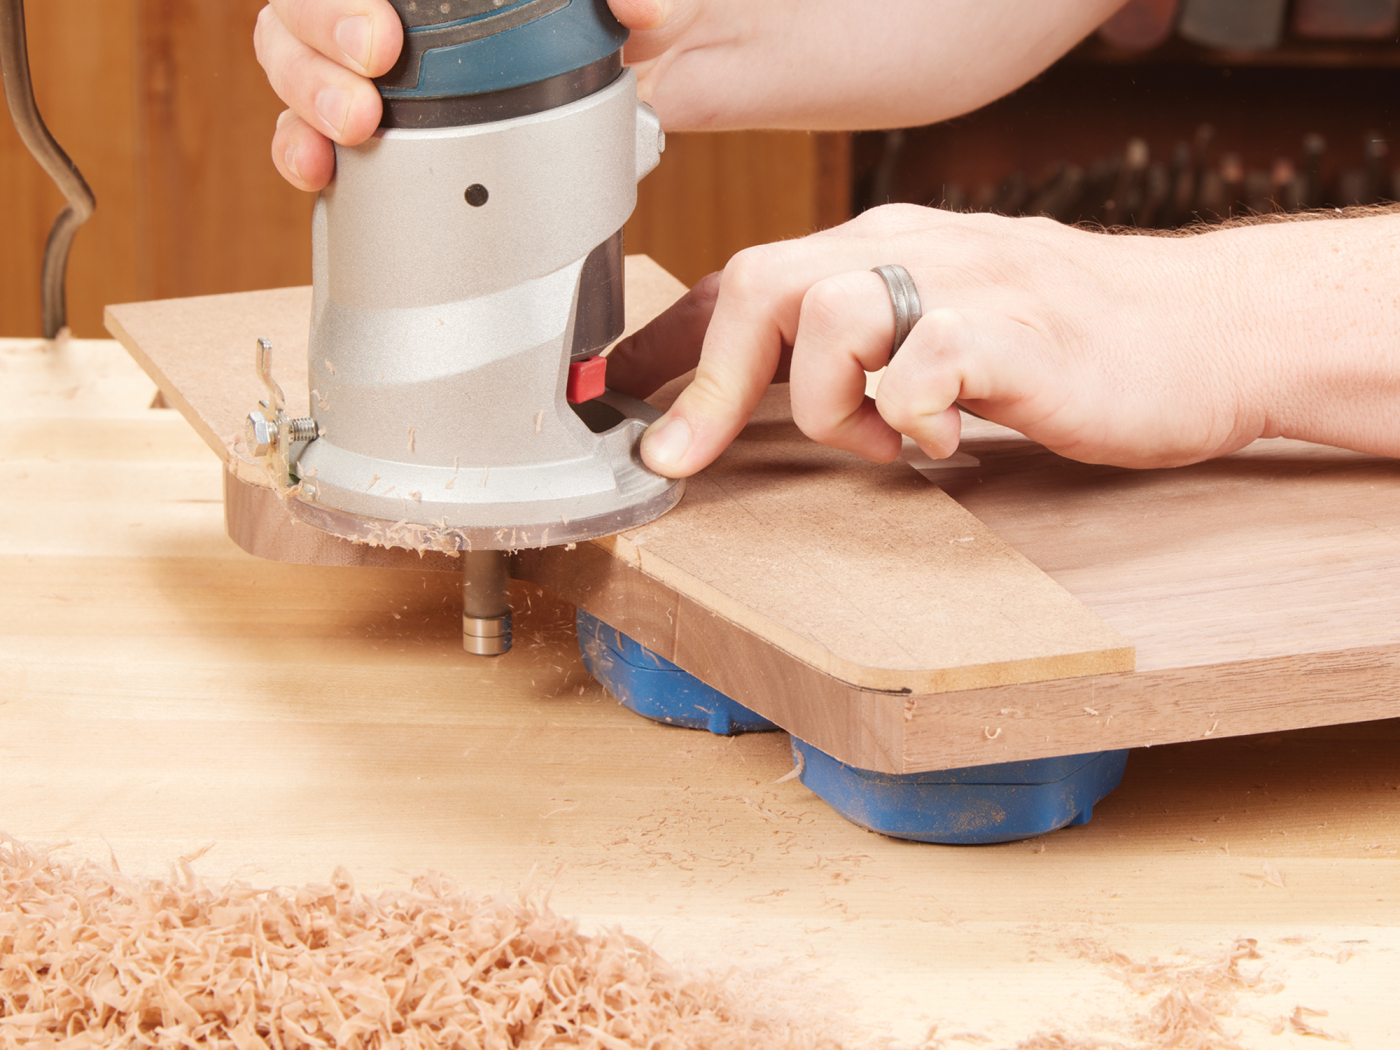
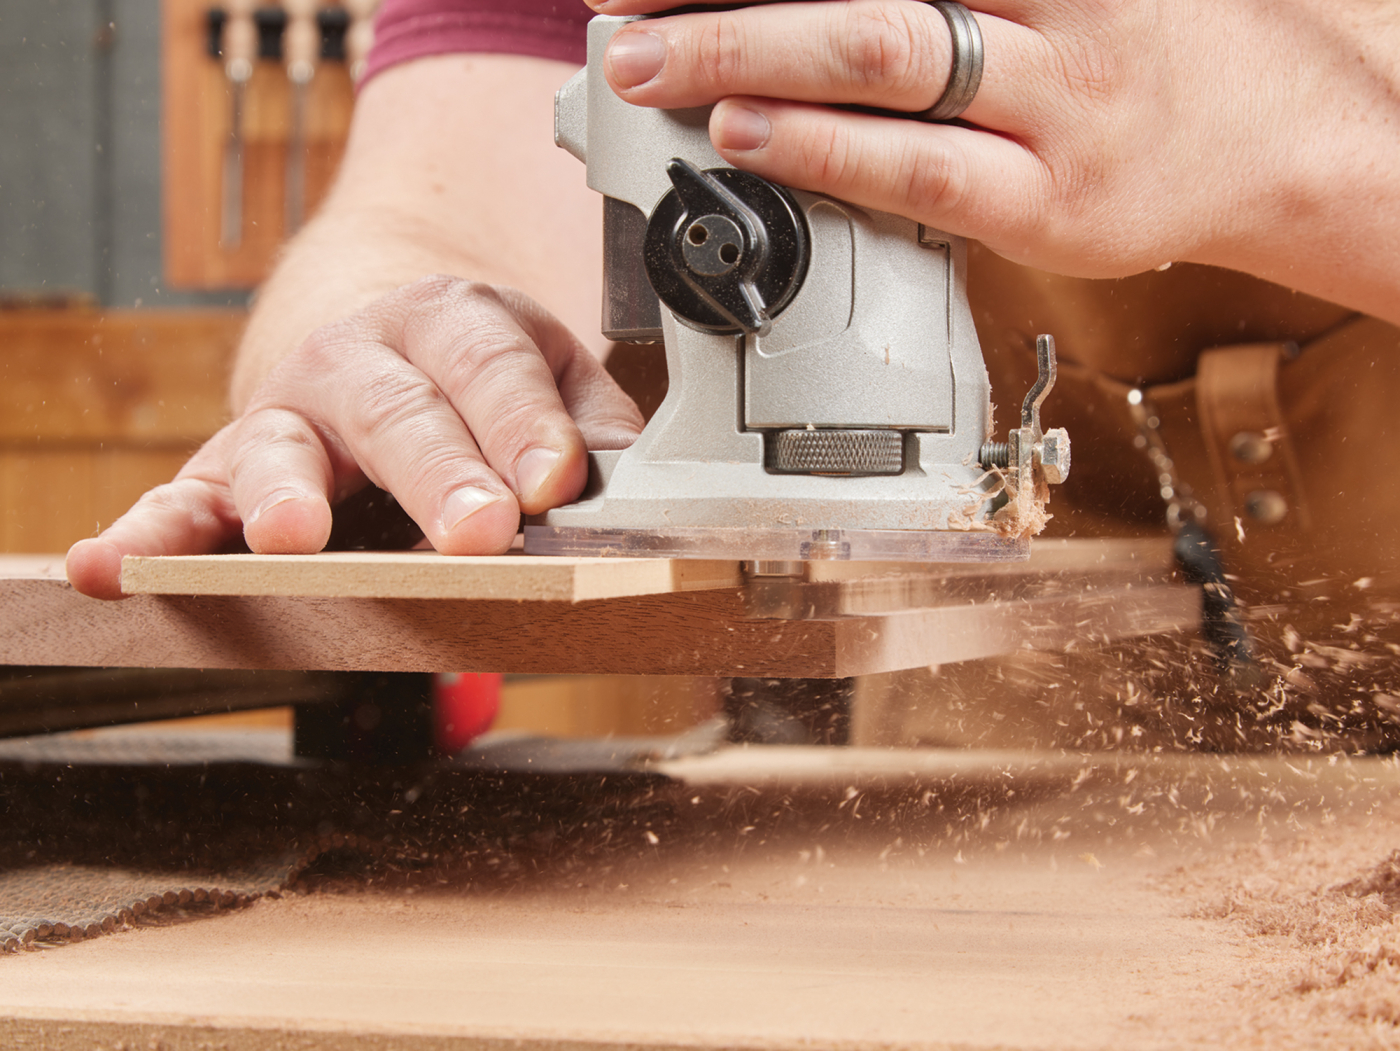
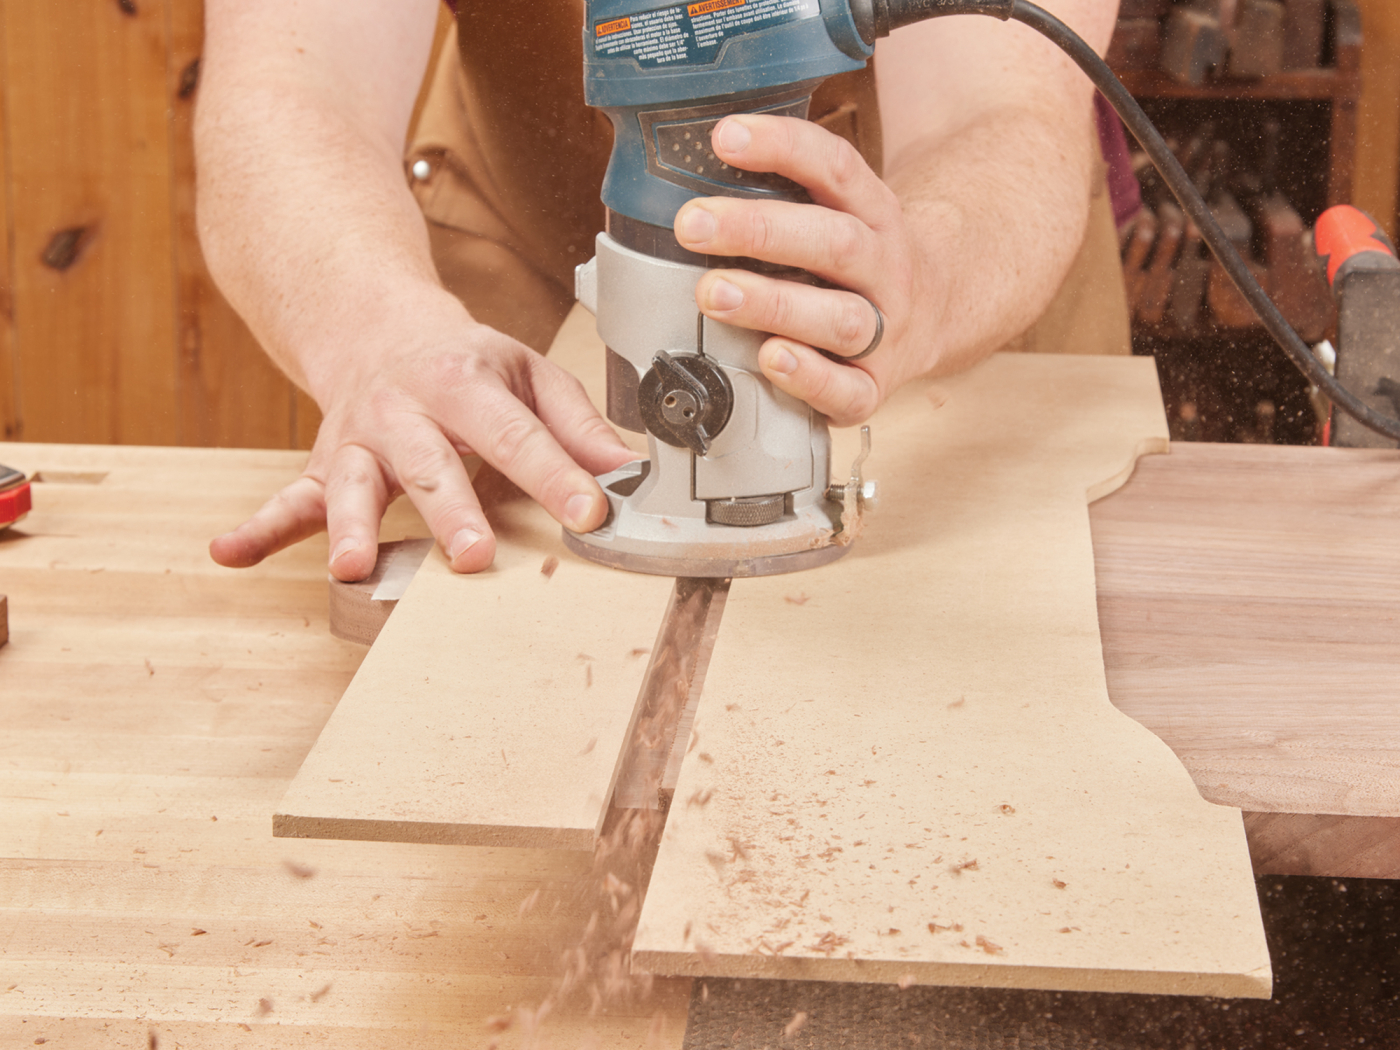
The cabinet sides incorporate a graceful decorative cutout along their lower edges. To ensure symmetry, bond the pair together with double-sided tape and fabricate them simultaneously.
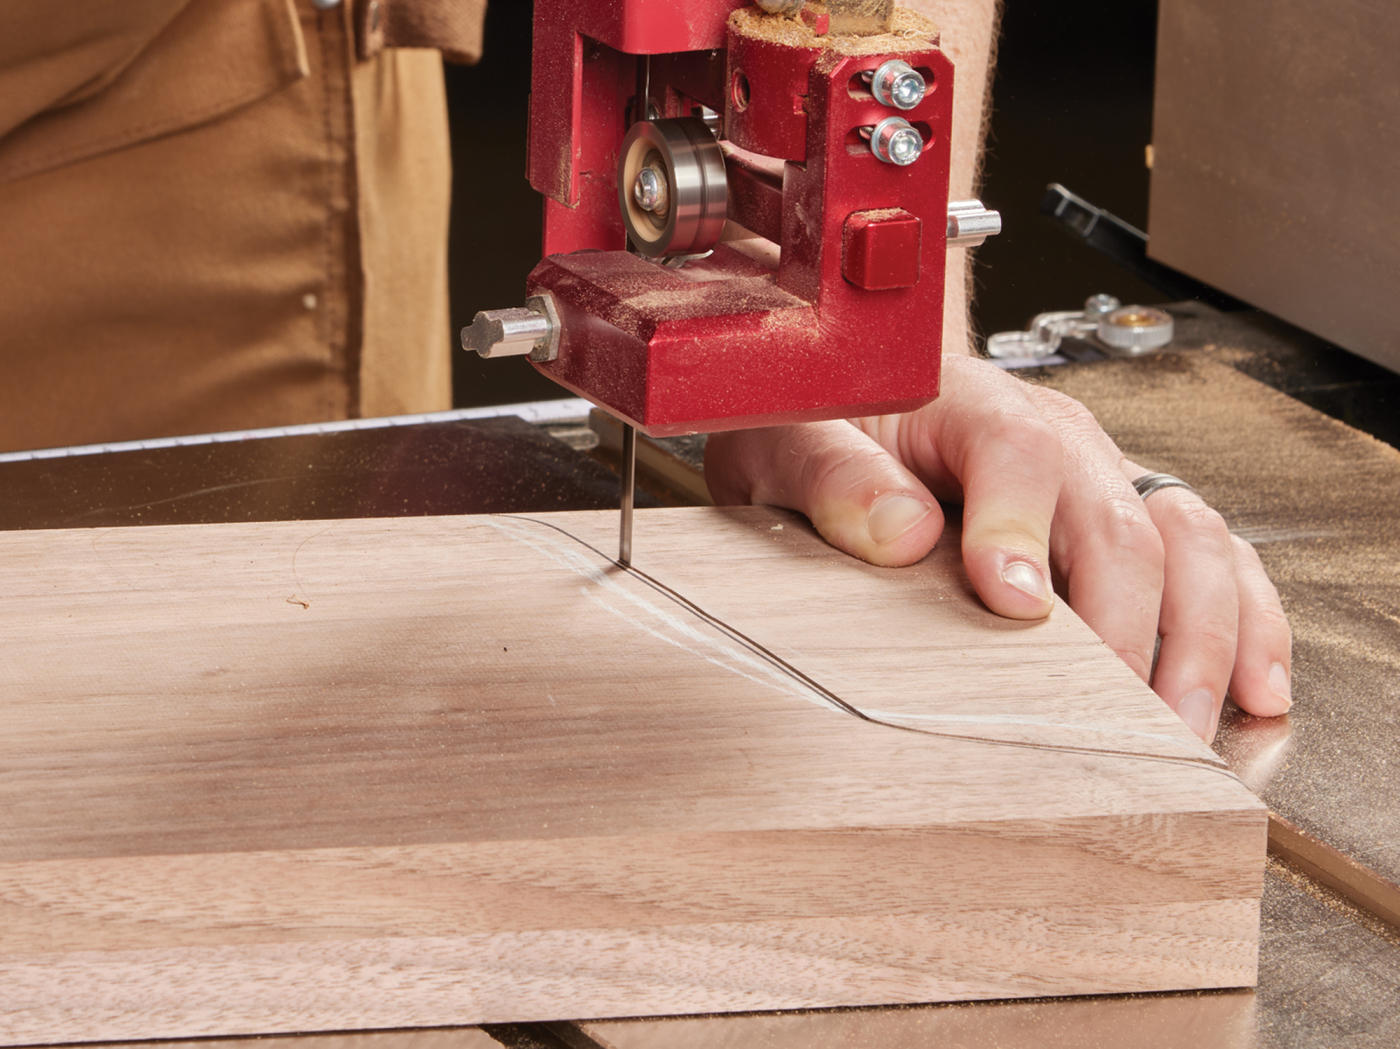
Craft a hardboard template matching the desired profile and cut it on the bandsaw. Trace the pattern onto the taped sides, then bandsaw the shape. At the workbench, employ the template to rout the profiles with a bearing-guided bit. Light passes with a sharp cutter yield exceptionally smooth results, even on end grain.
Executing the Rabbet and Dado Joints
As noted previously, the cabinet employs minimalist joinery: a rabbet secures the top panel, while a dado accommodates the bottom. While a table saw could handle these, combining a dedicated dado clean-out router bit with shop-made hardboard fences offers foolproof precision. The sequence for the rabbet along the top edges of the sides begins with accurate layout lines. Secure a hardboard fence with double-sided tape aligned to the marks. Rout the rabbet in incremental shallow passes, allowing the bearing to track the fence on the final pass.

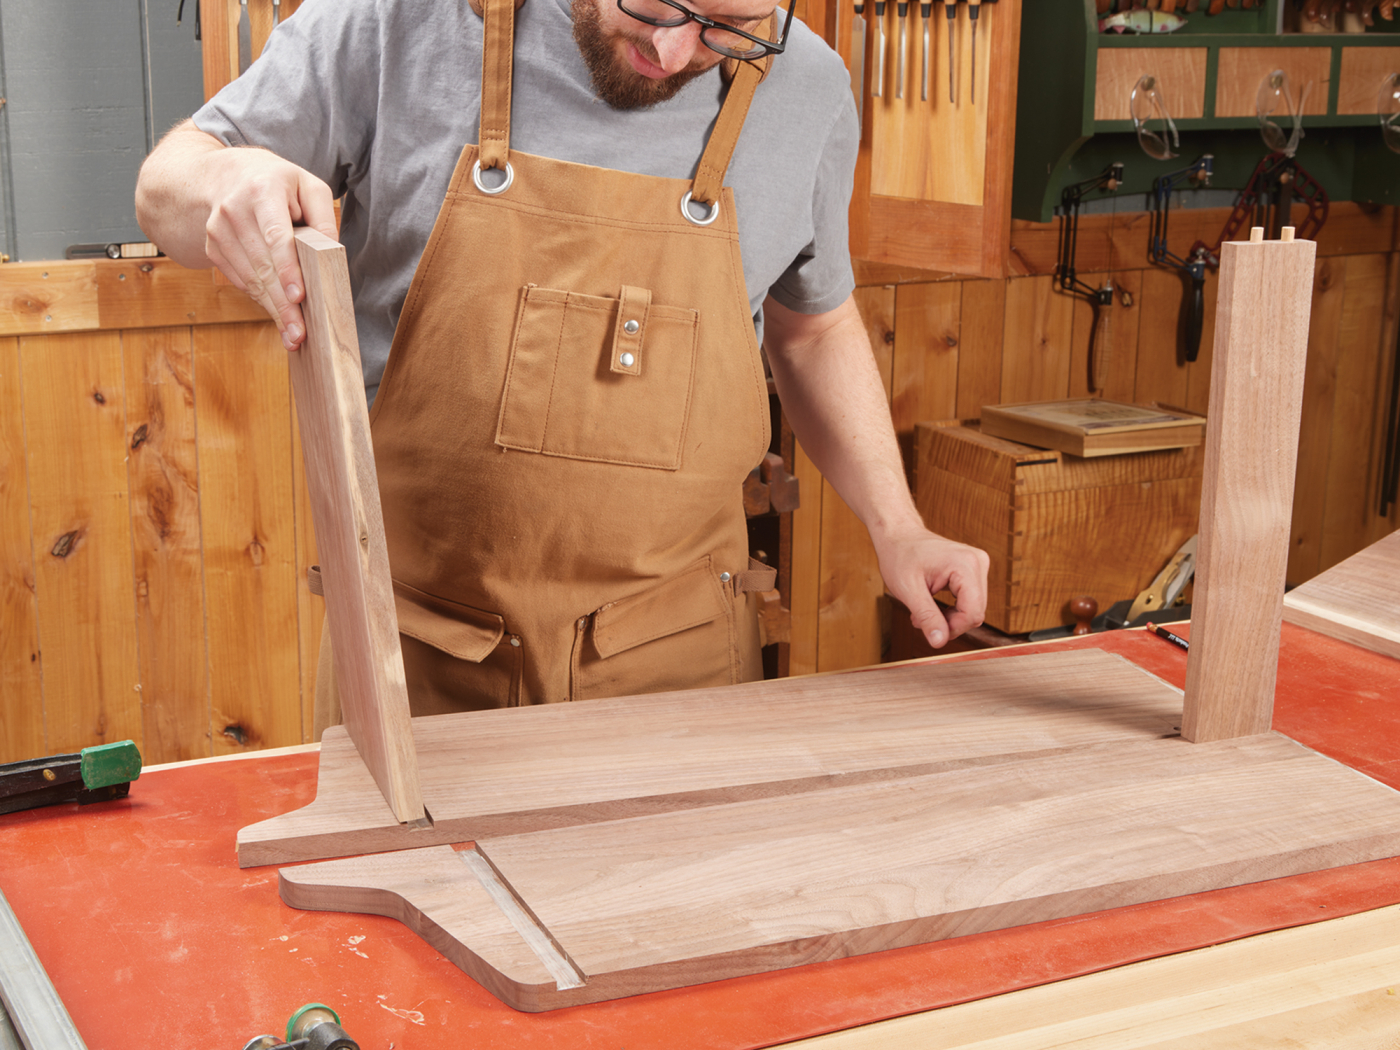
The dadoes follow a parallel process. Position the hardboard guides using the actual bottom panel for exact spacing, taped securely in place. Rout multiple passes along each fence, respecting the bit’s rotation to avoid climb cutting. This method surpasses table saw setups for small quantities, guaranteeing perfect fits. Dry-assemble the case at this stage to verify alignment.
Addressing Miscellaneous Details
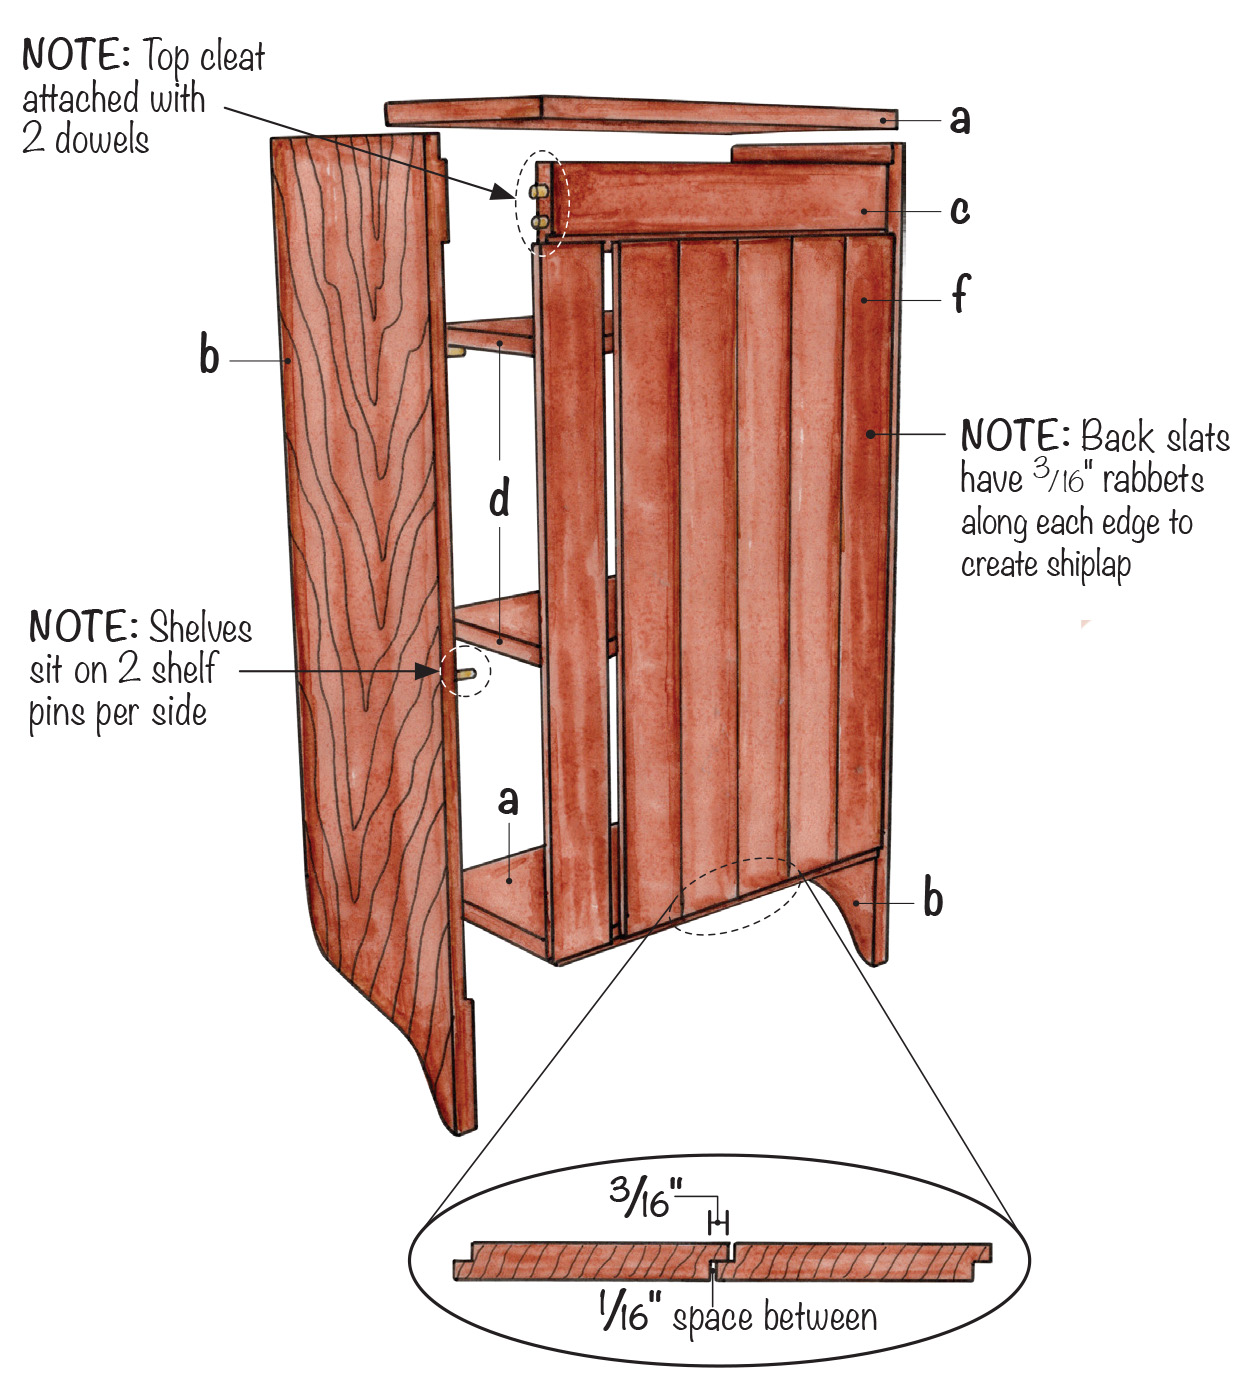
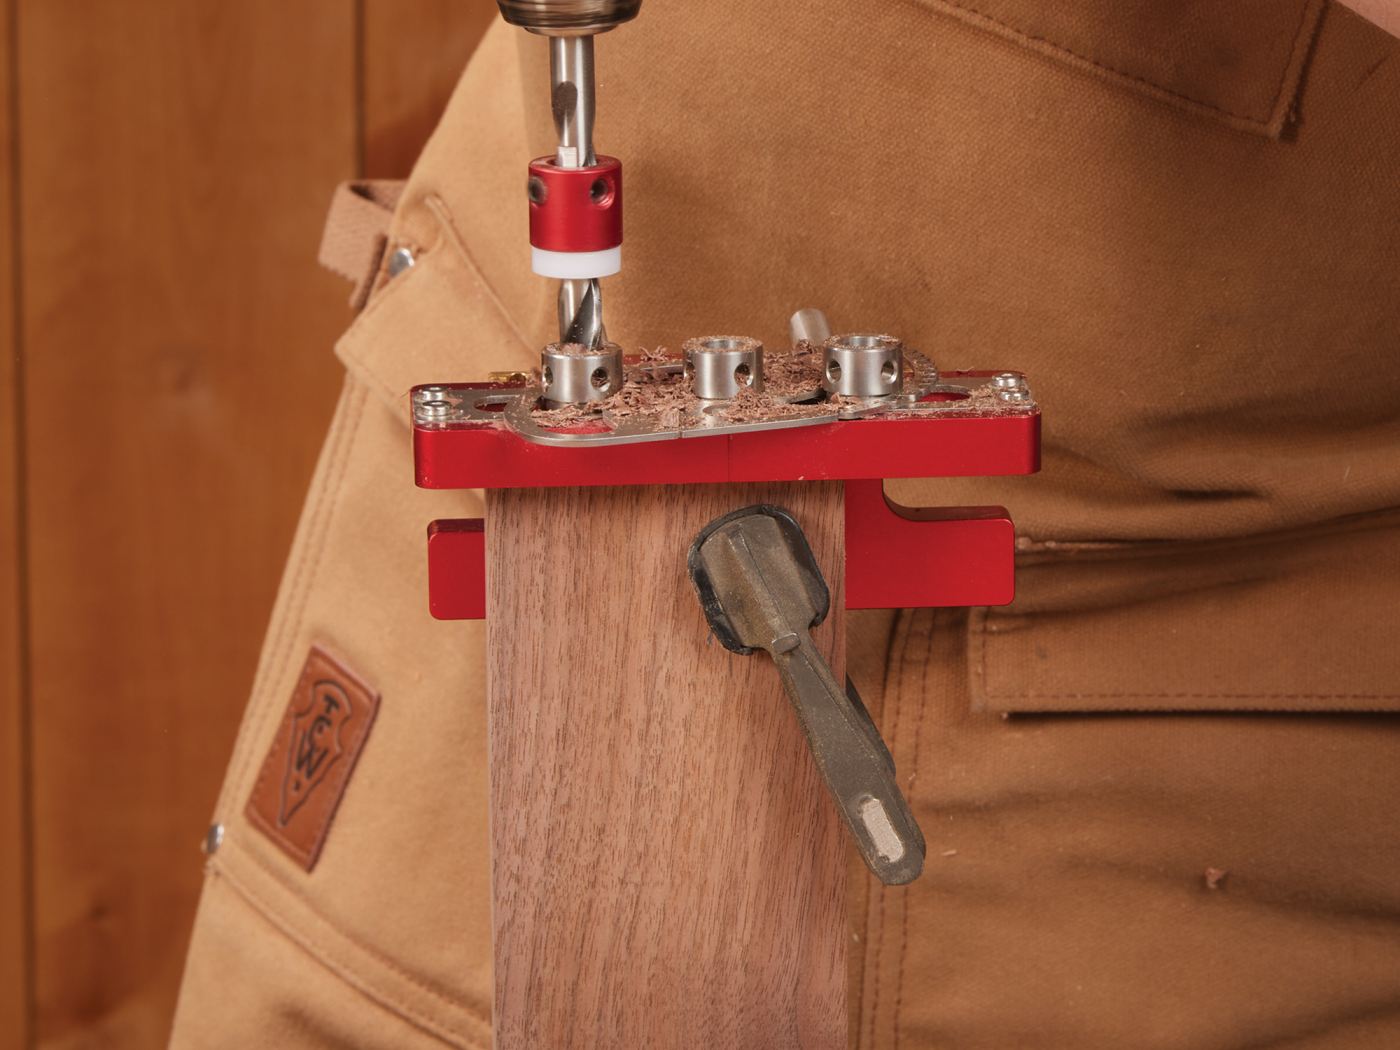
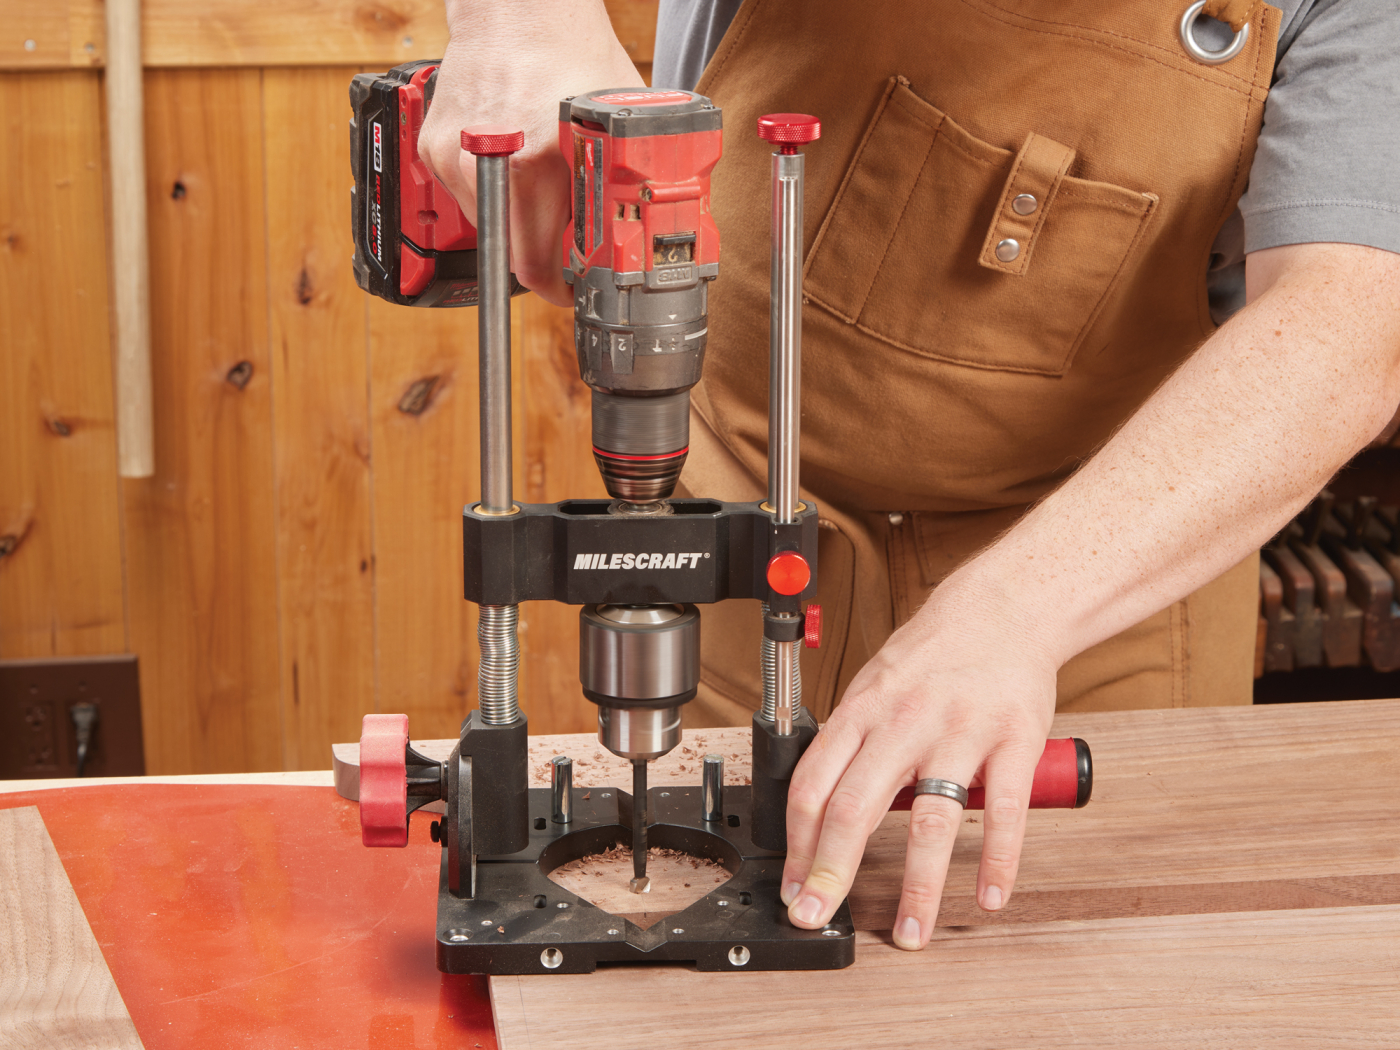
Prior to final case assembly, complete several preparatory steps. Install a rear hanging cleat for secure wall mounting. Simple dowel joinery suffices: drill dowels into the cleat ends, transfer locations to the case sides using dowel centers, and bore matching holes.
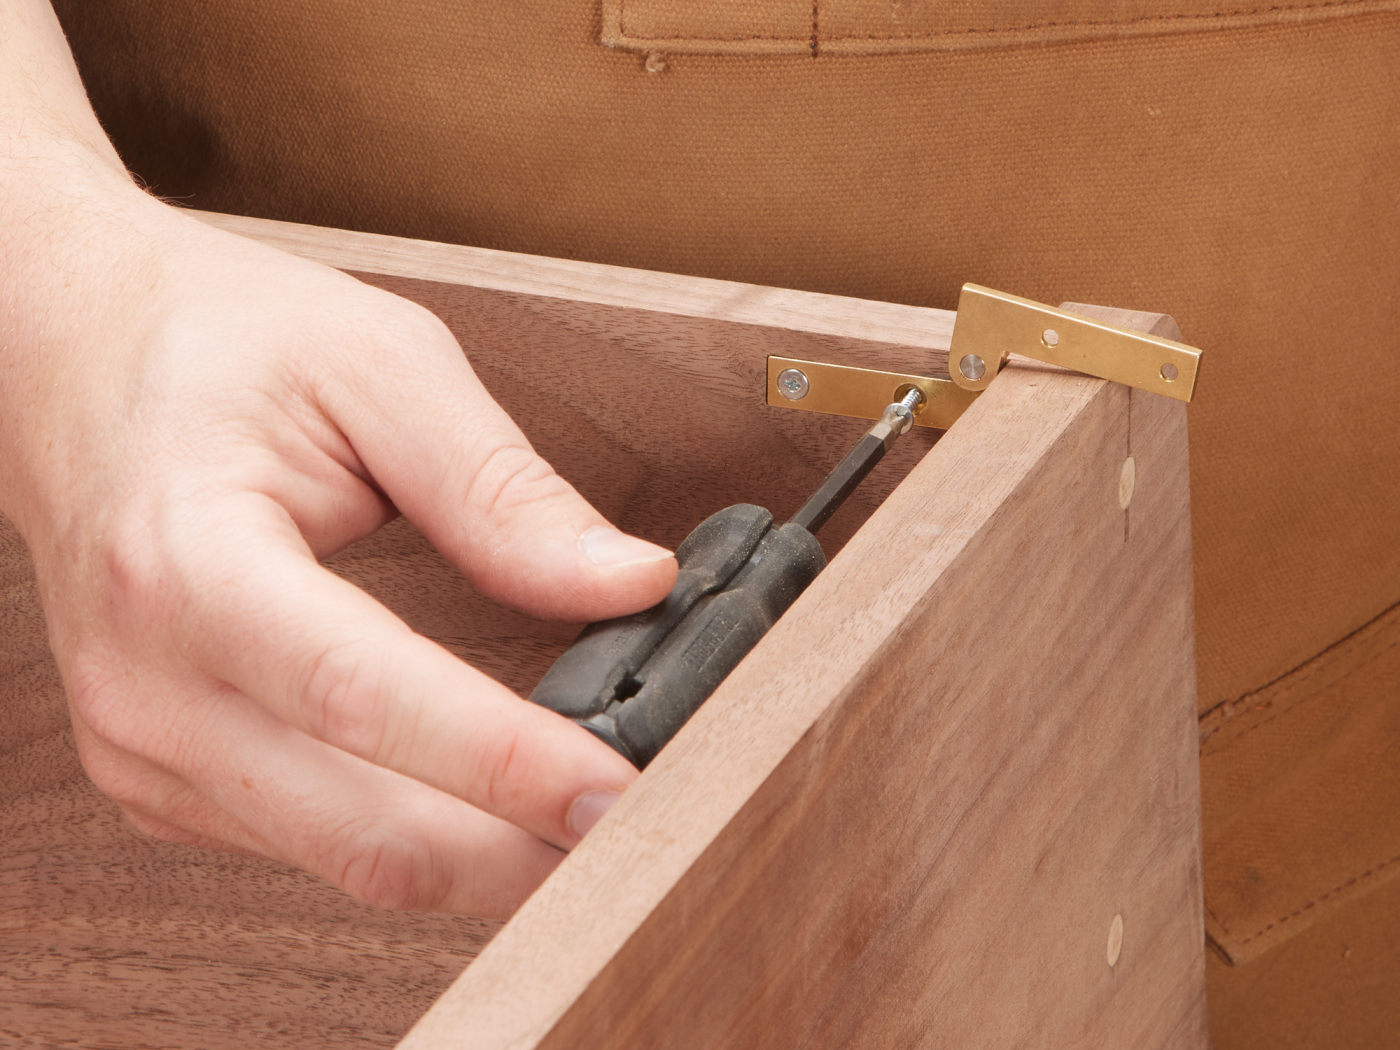
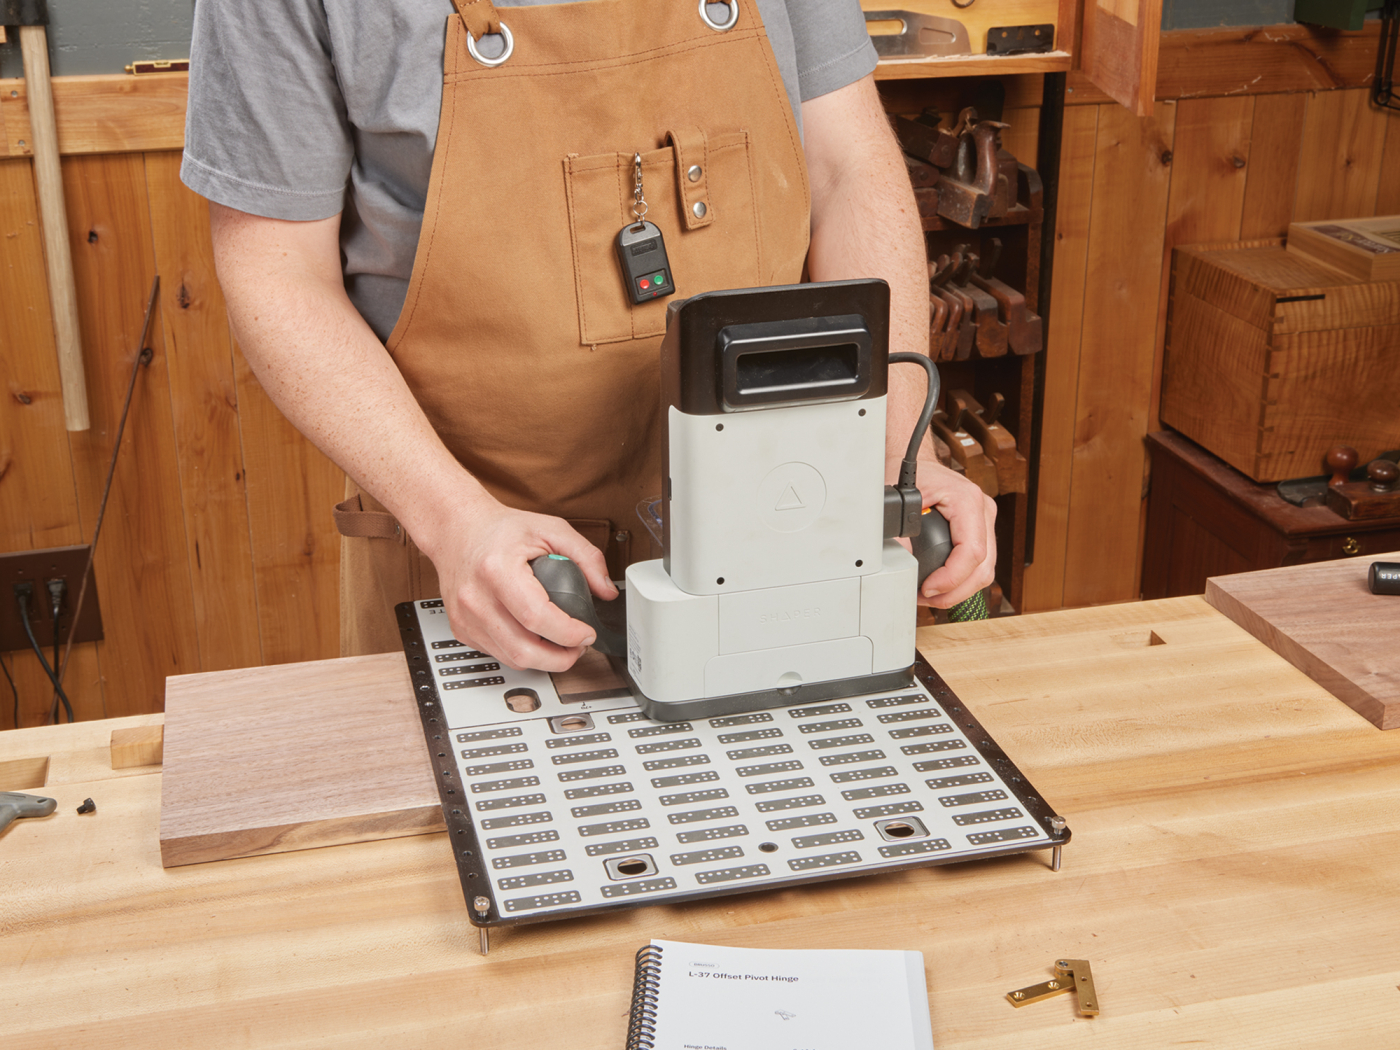
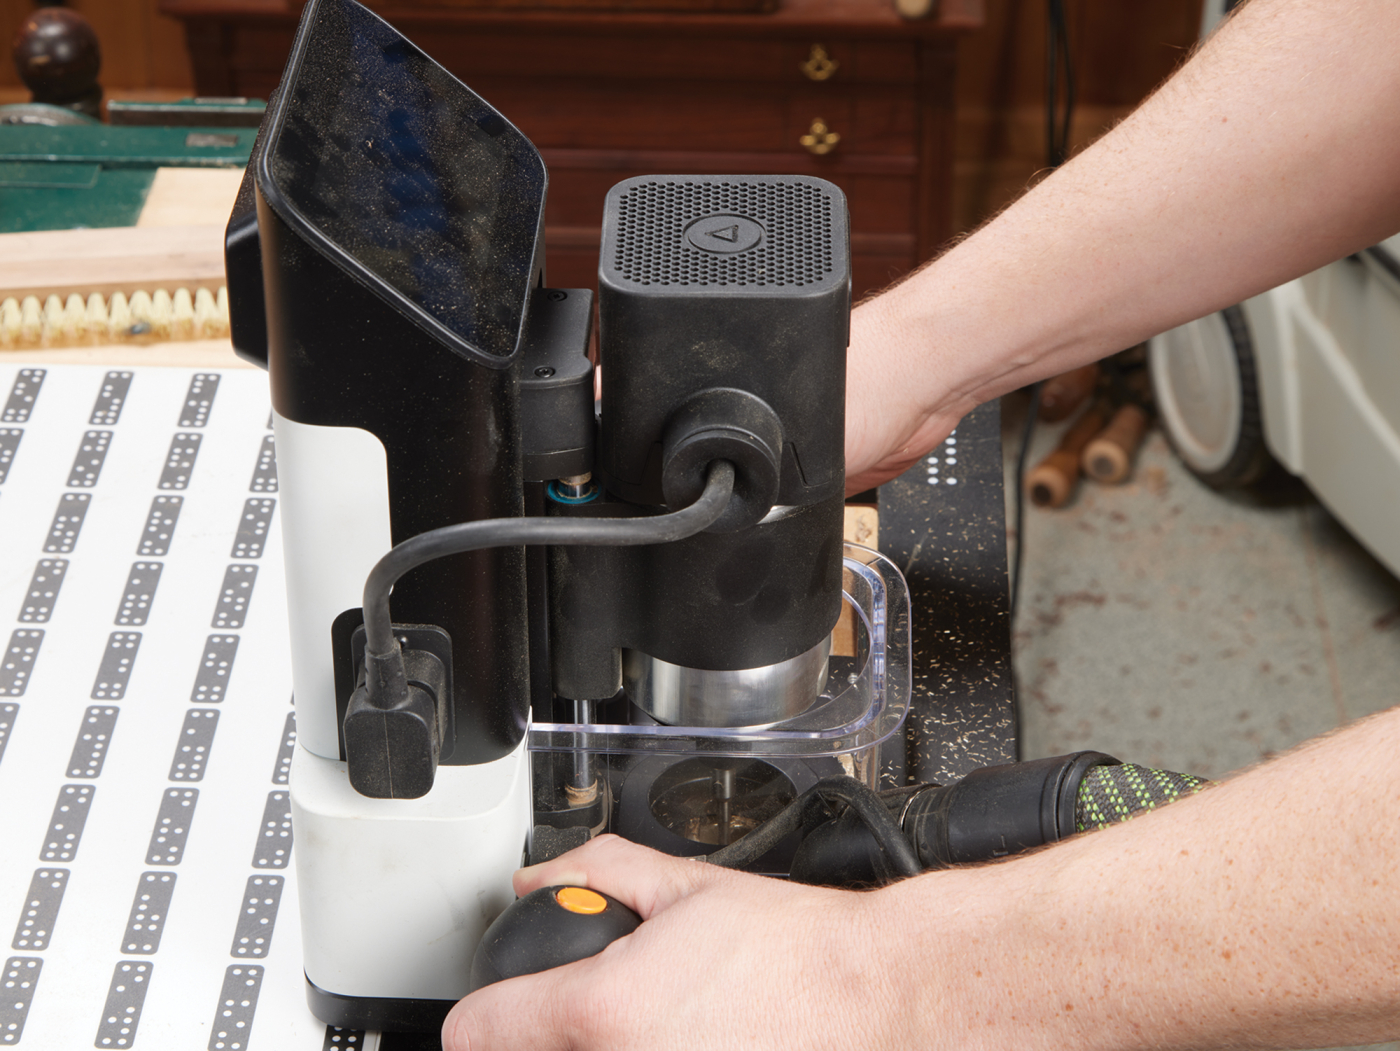
The selected offset pivot hinges necessitate recesses in the case top and bottom. Routing these post-assembly would prove challenging, so prepare them now. Utilizing a Shaper Origin with preloaded hardware templates simplifies positioning via the Shaper Plate. Square the rounded corners with a chisel for crisp mortises. Similarly, pre-drill shallow holes for the screw-covering dowel plugs using a drill guide and Forstner bit, aiding screw placement during glue-up.
Assembling the Case Structure
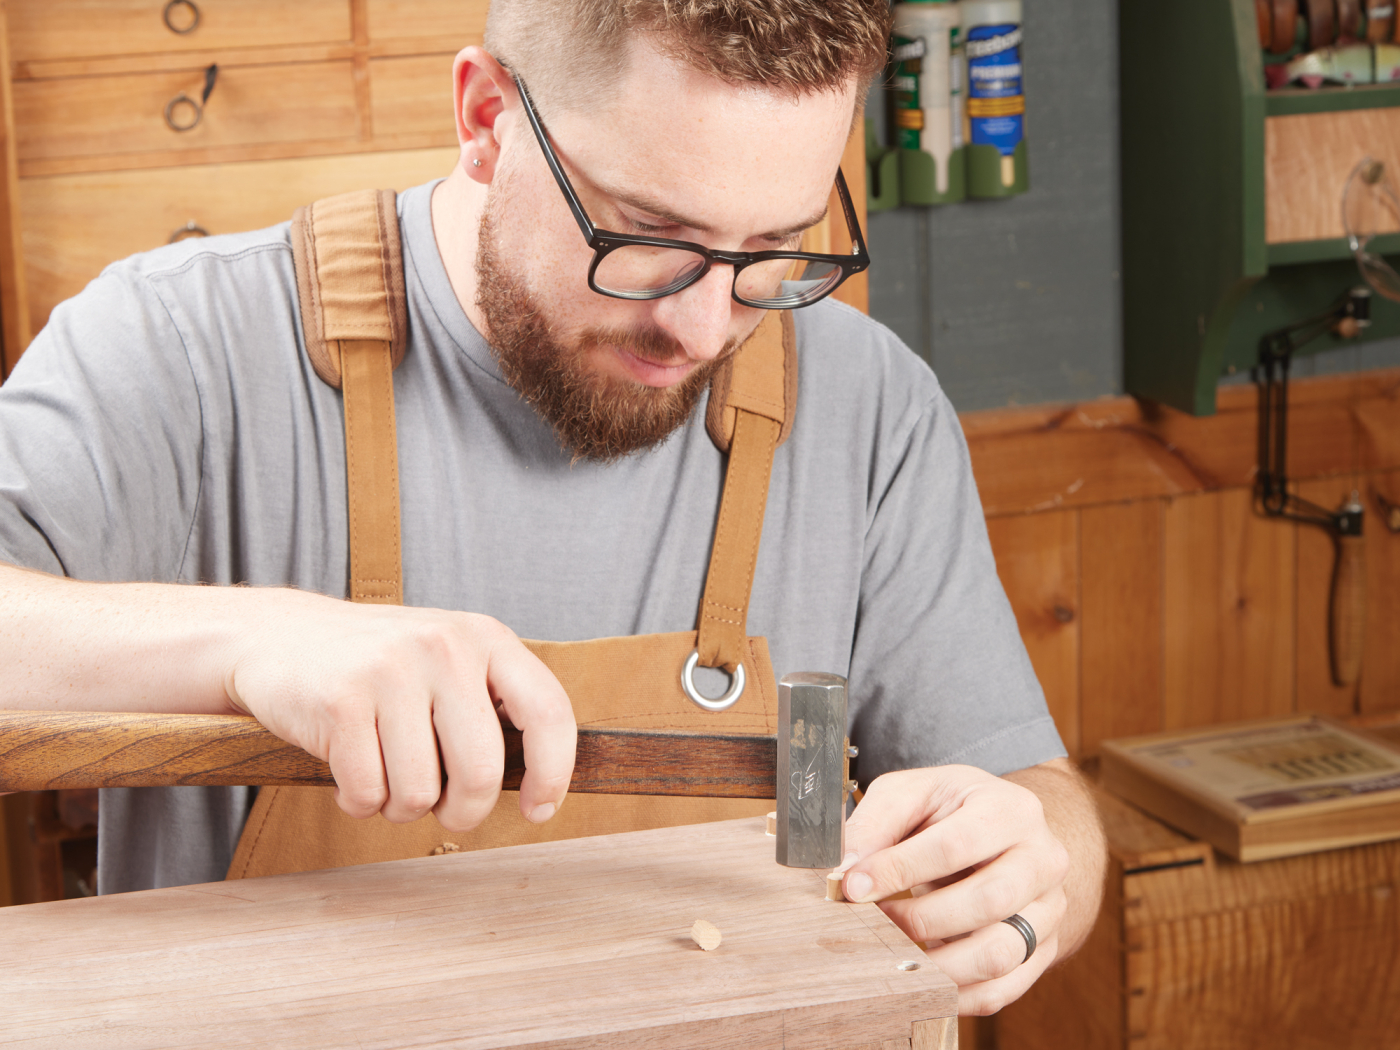
With preparations complete, proceed to case assembly. Apply glue solely to the rabbets and dadoes; the dowel-secured cleat requires none. Insert the top and bottom panels, align the opposite side, and drive screws directly without clamps—their clamping action suffices as glue cures.
Recalling high school woodworking lessons on concealing screws with plugs, I instead embraced Maloof’s approach of celebrating them as design features. Contrasting cherry dowels provide subtle accents; their end grain, which darkens slightly under finish, contrasts elegantly with the walnut.
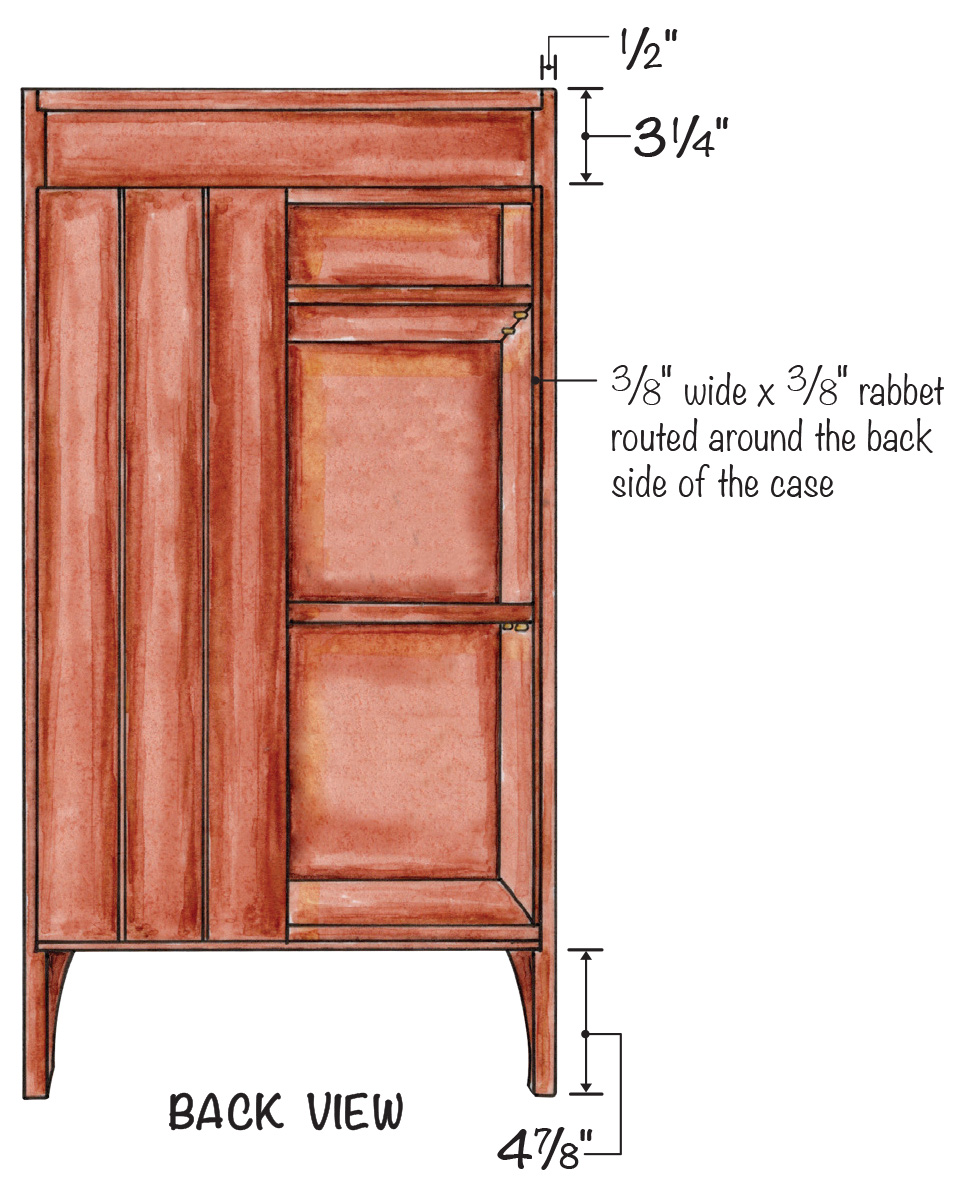
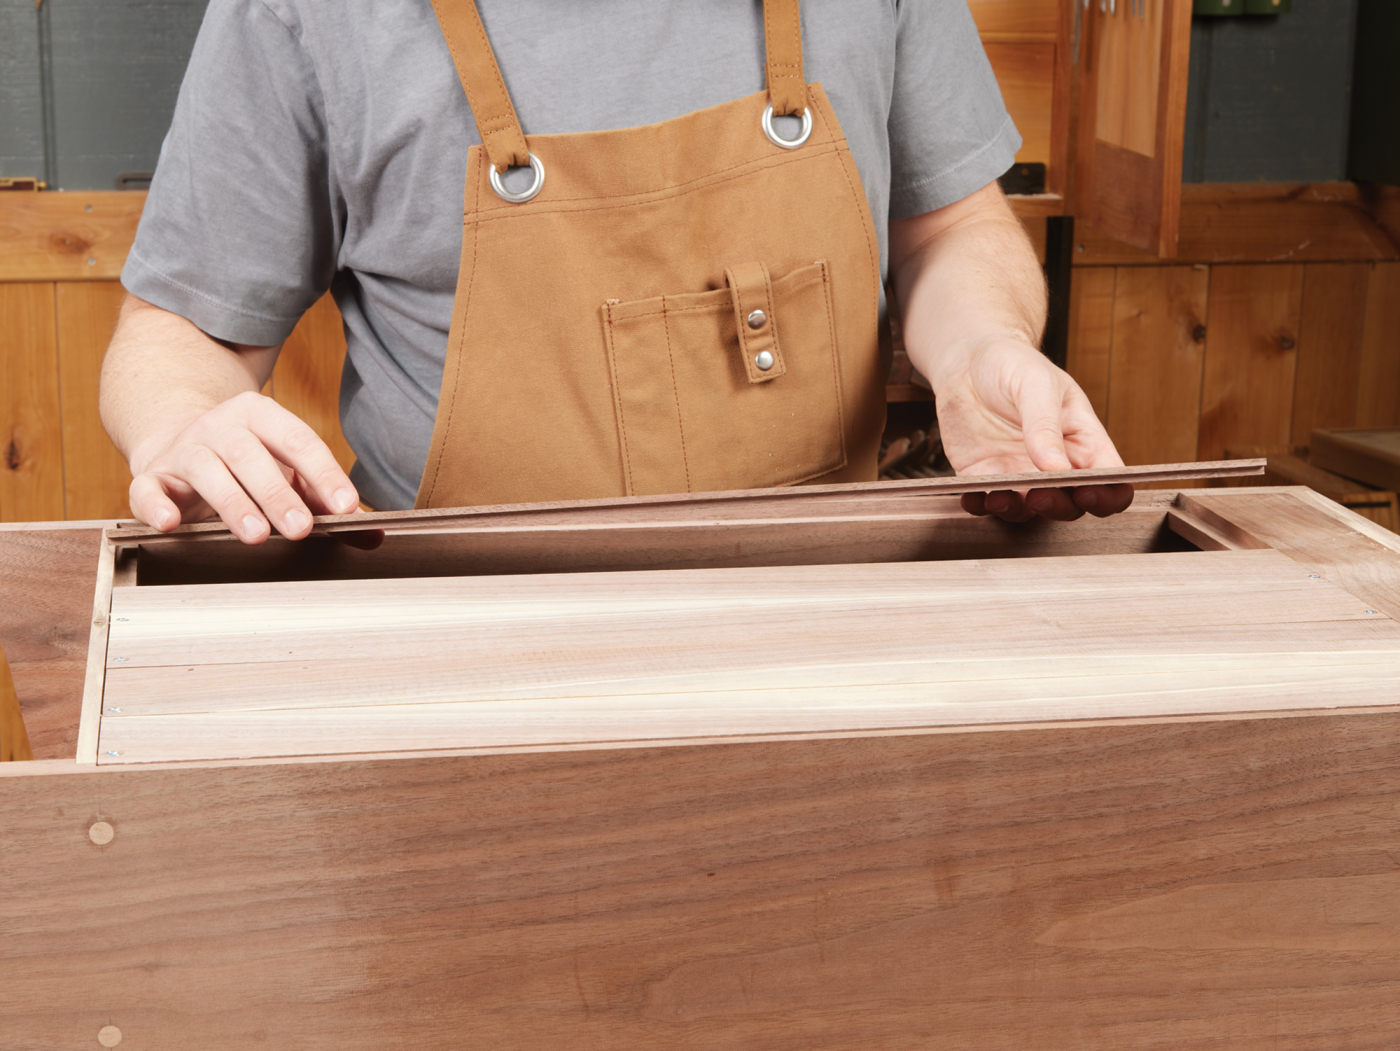
Crafting the Shiplap Back Panel
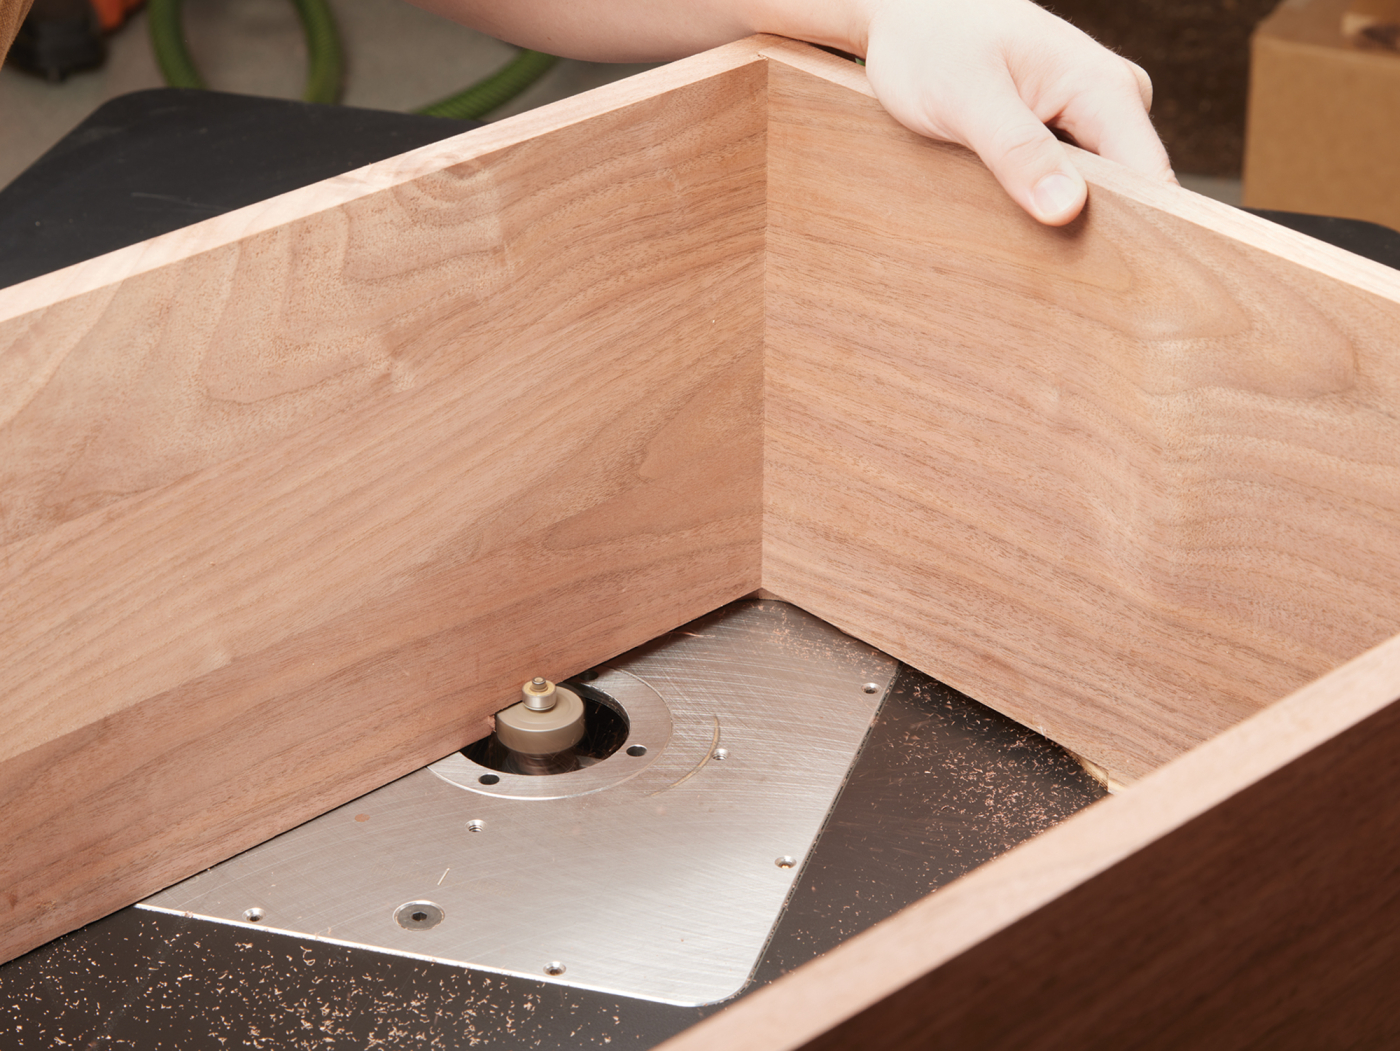
The cabinet back features hardwood shiplap, incorporating sapwood in a striking contrasting arrangement. It seats within a perimeter rabbet around the case interior. For this scale, a router table with rabbeting bit efficiently forms the recess: run the case along the fence and bit to cut the sides, bottom, and cleat edge. Chisel the corners square for tight shiplap fitment.
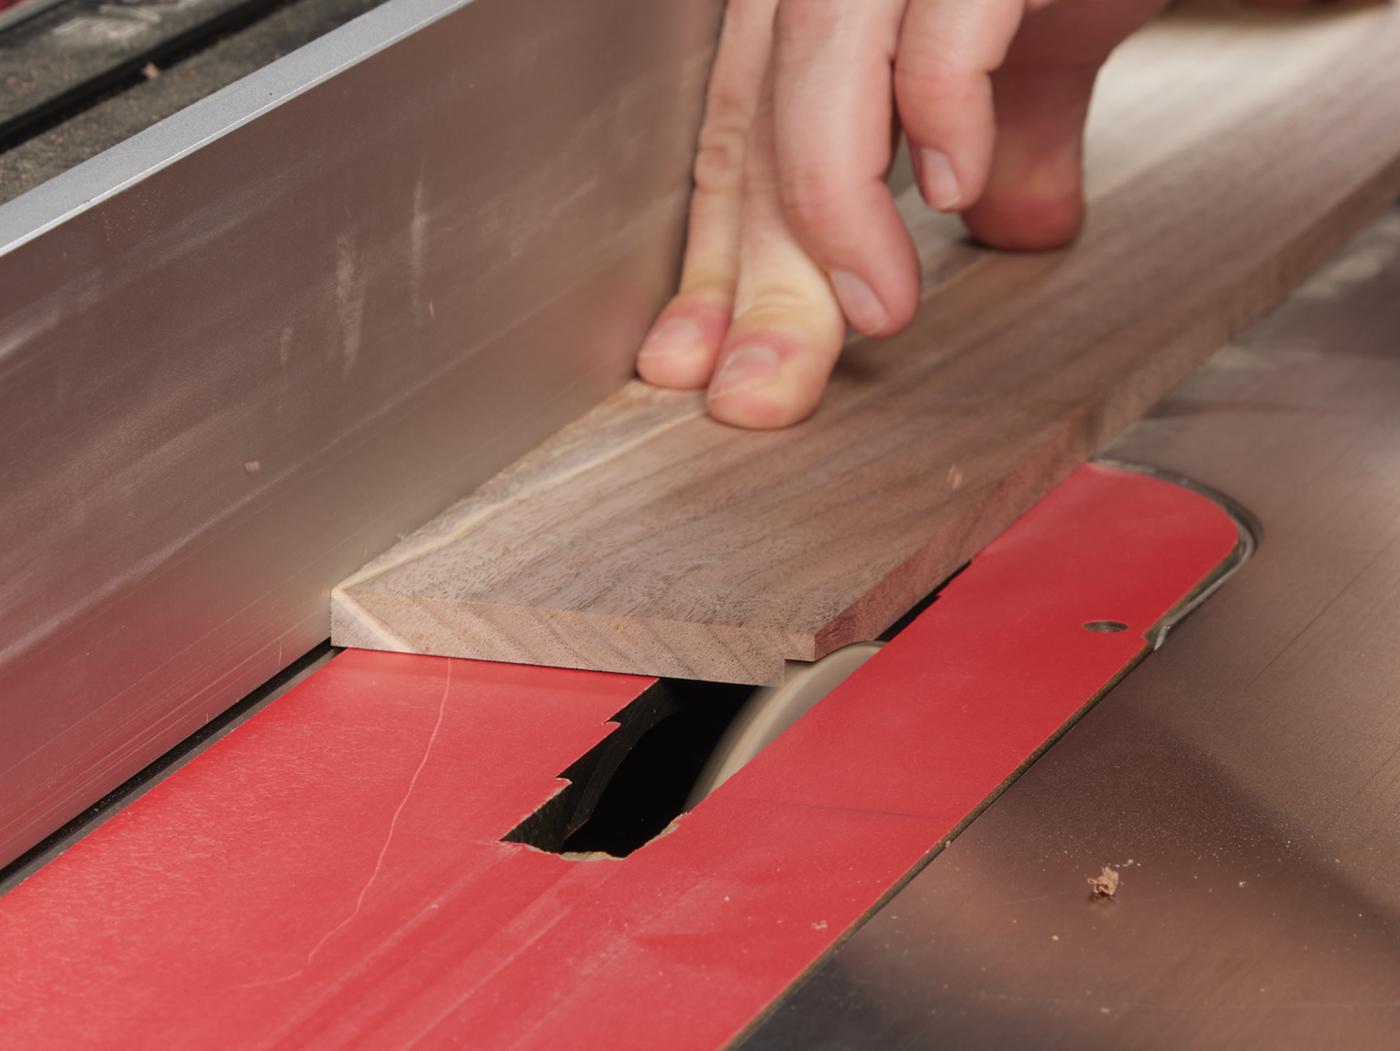
Shiplap derives from thin resawn sapwood offcuts, with opposing rabbets along long edges created via two table saw passes—no setup alterations needed. Book-match resawn blanks, then arrange into a houndstooth pattern visible only when the cabinet is opened, adding whimsical interior detail.
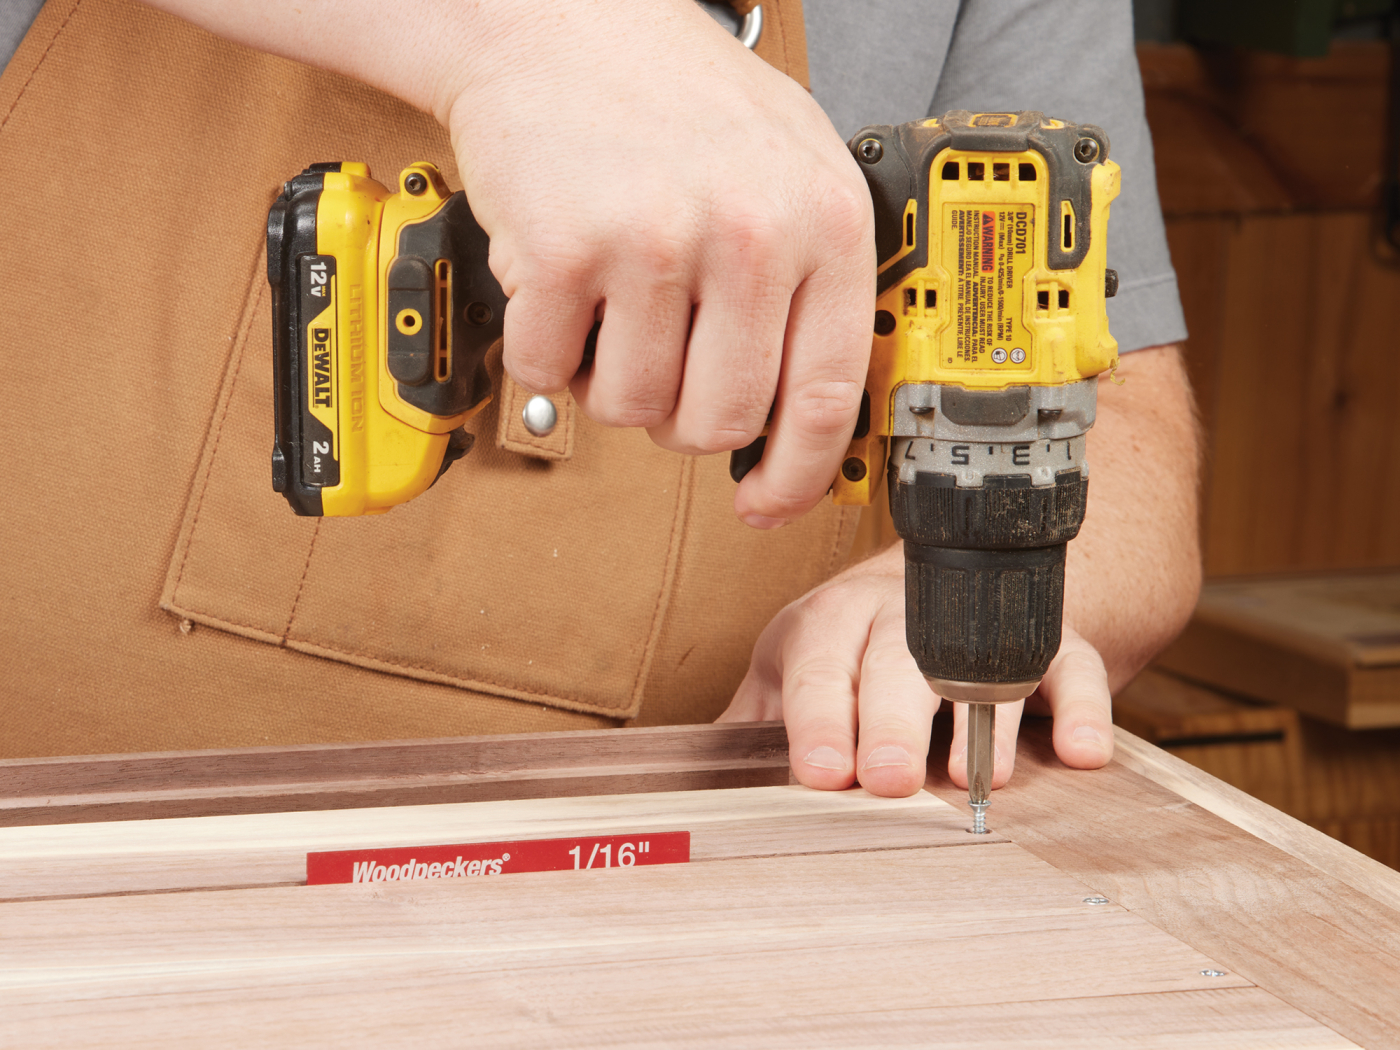
Lay shiplap starting centrally, progressing outward; trim end pieces precisely. The interlocking rabbets require just one screw per board (top and bottom), with predecessors locking alignment. Maintain generous spacing for seasonal movement using a setup block as a gauge. Pre-drill and countersink for short screws.
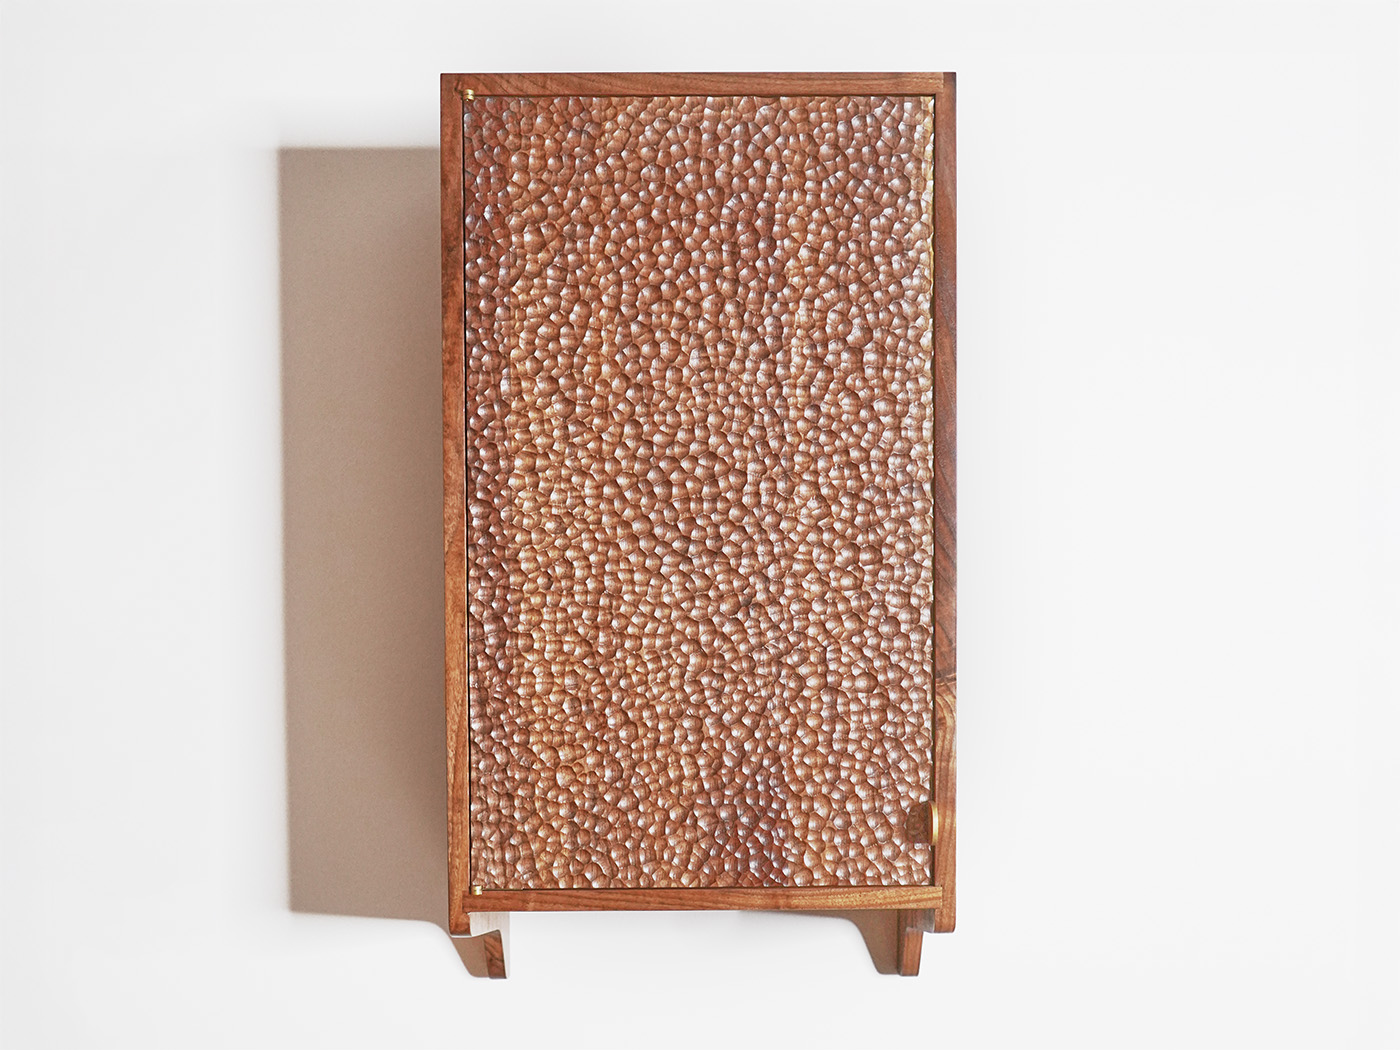
Fabricating the Textured Slab Door
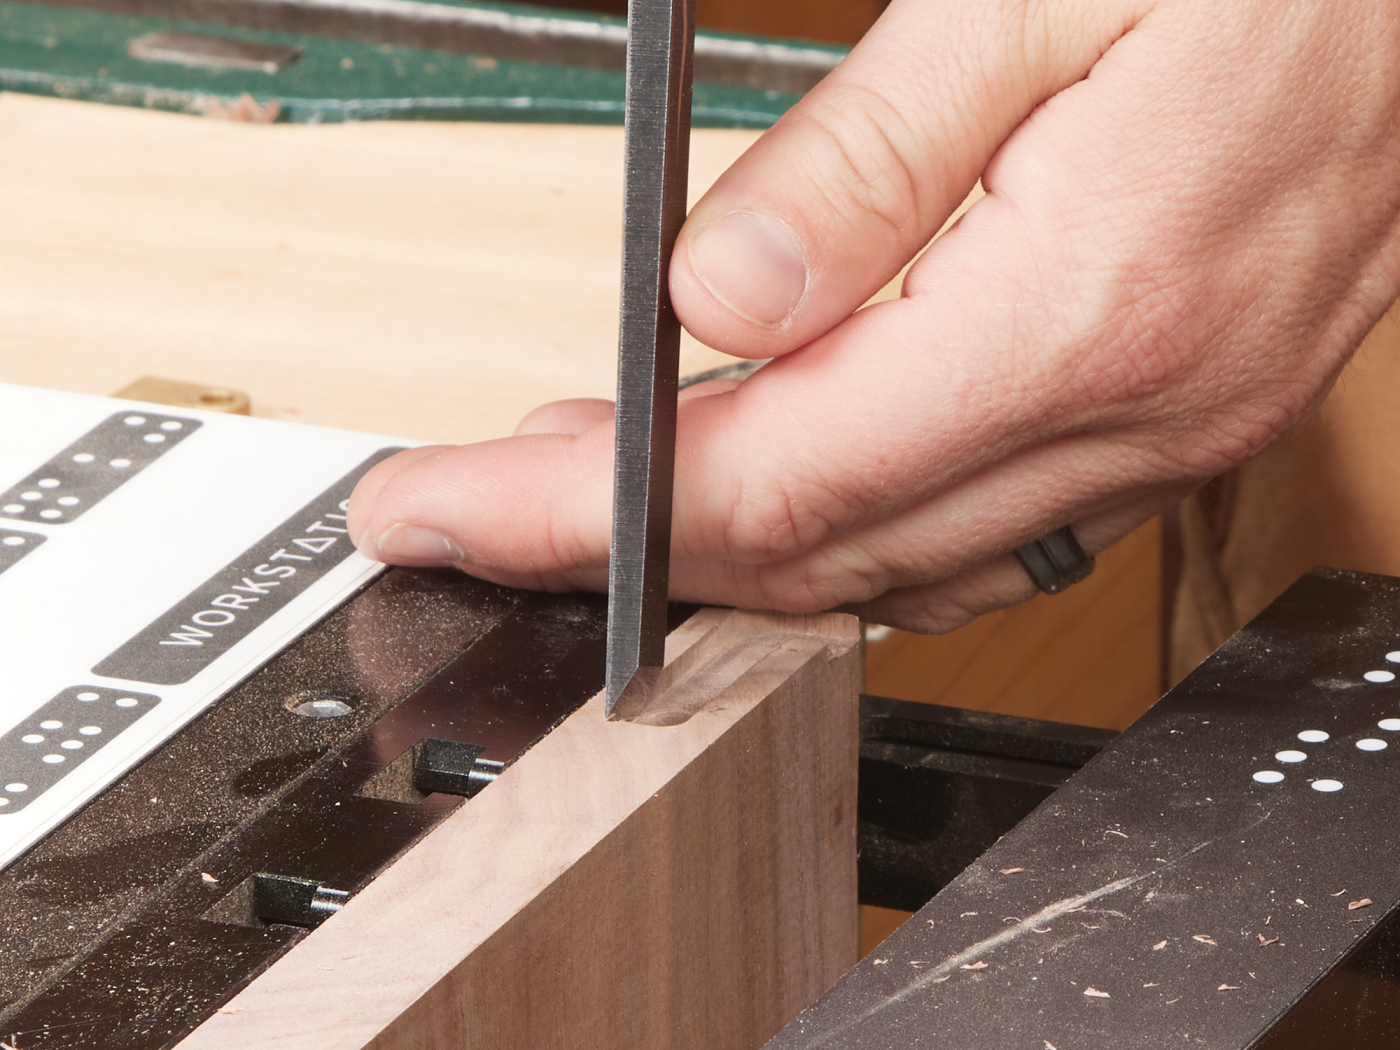
The door comprises a wide glued-up walnut slab, ideal for experimenting with organic surface texturing—grain selection was secondary, anticipating disruption via carving. First, rout hinge pockets on door ends using the Shaper Workstation, squaring rounds with a chisel.

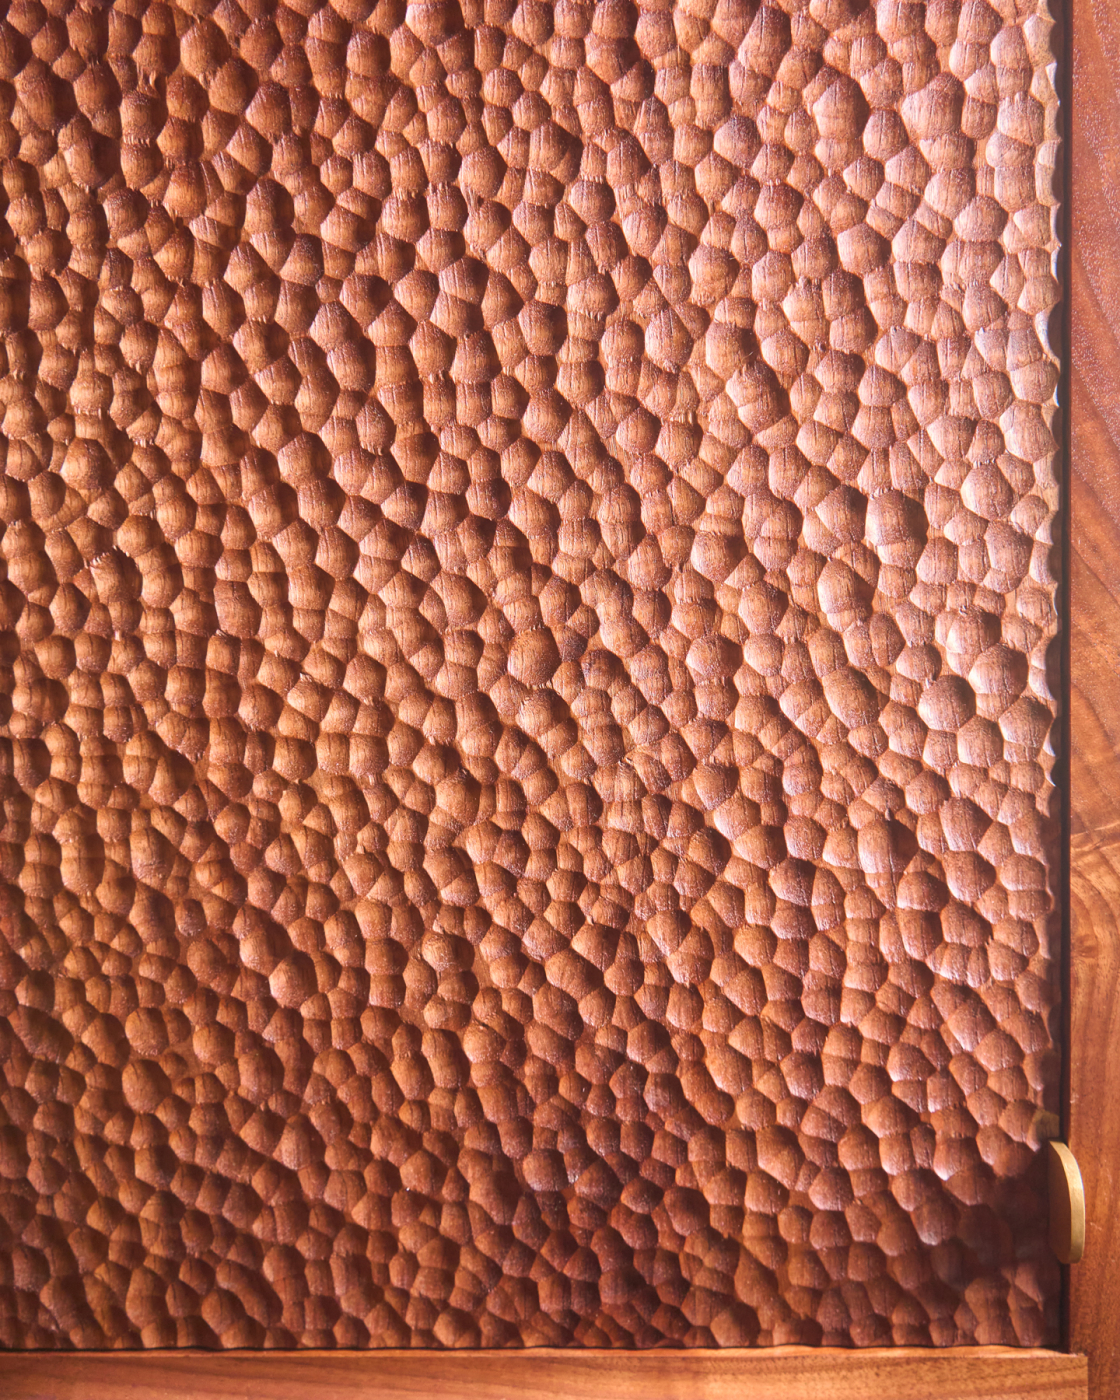
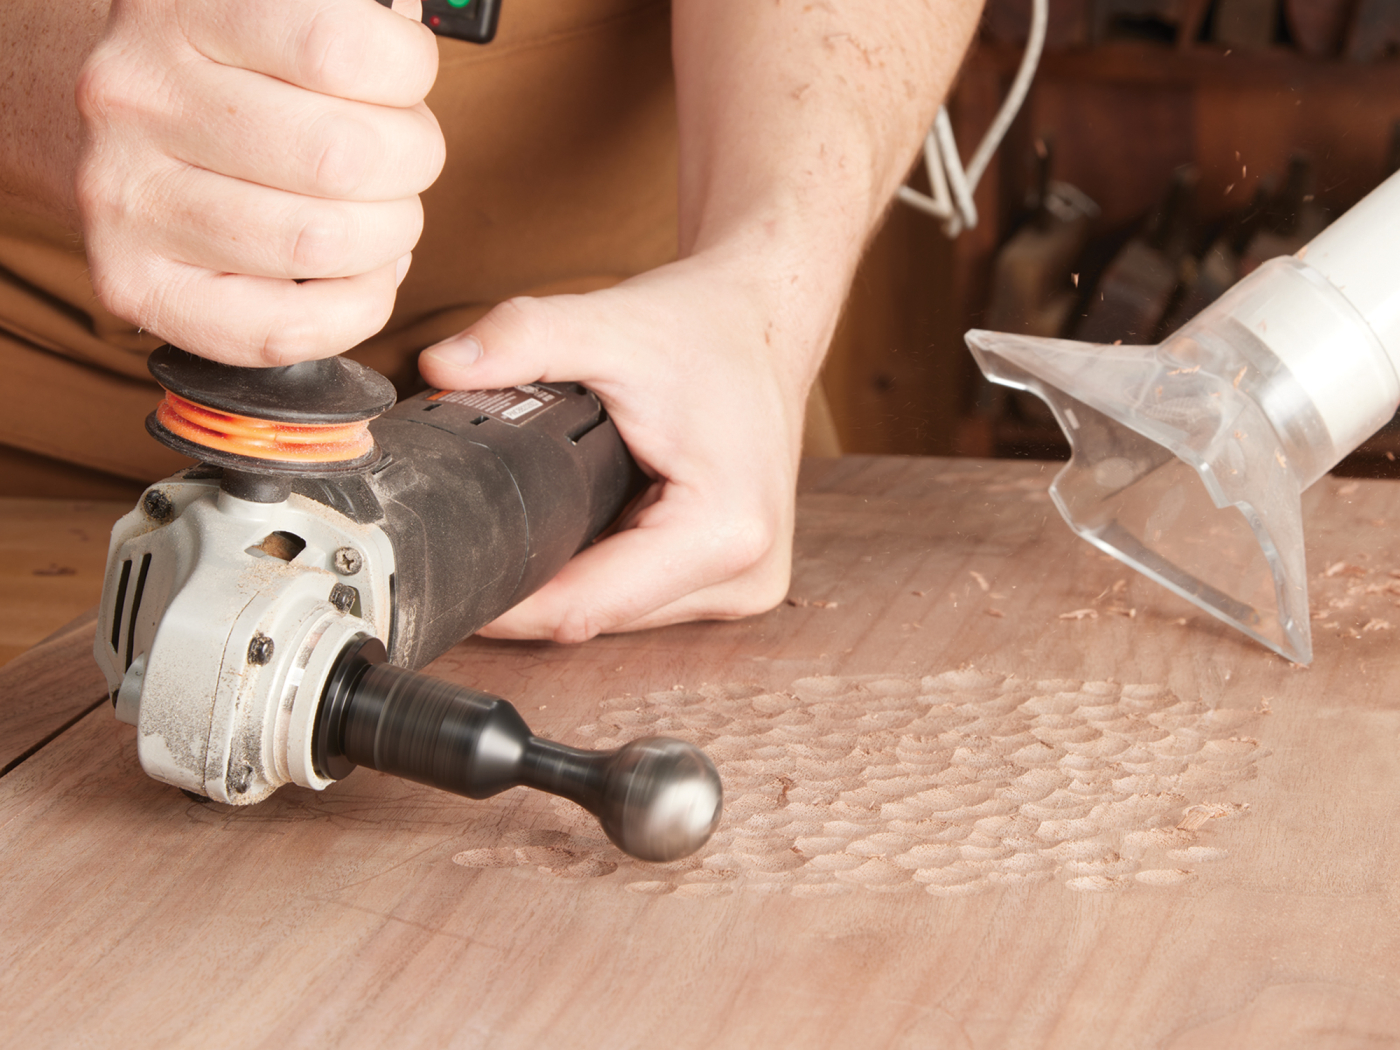
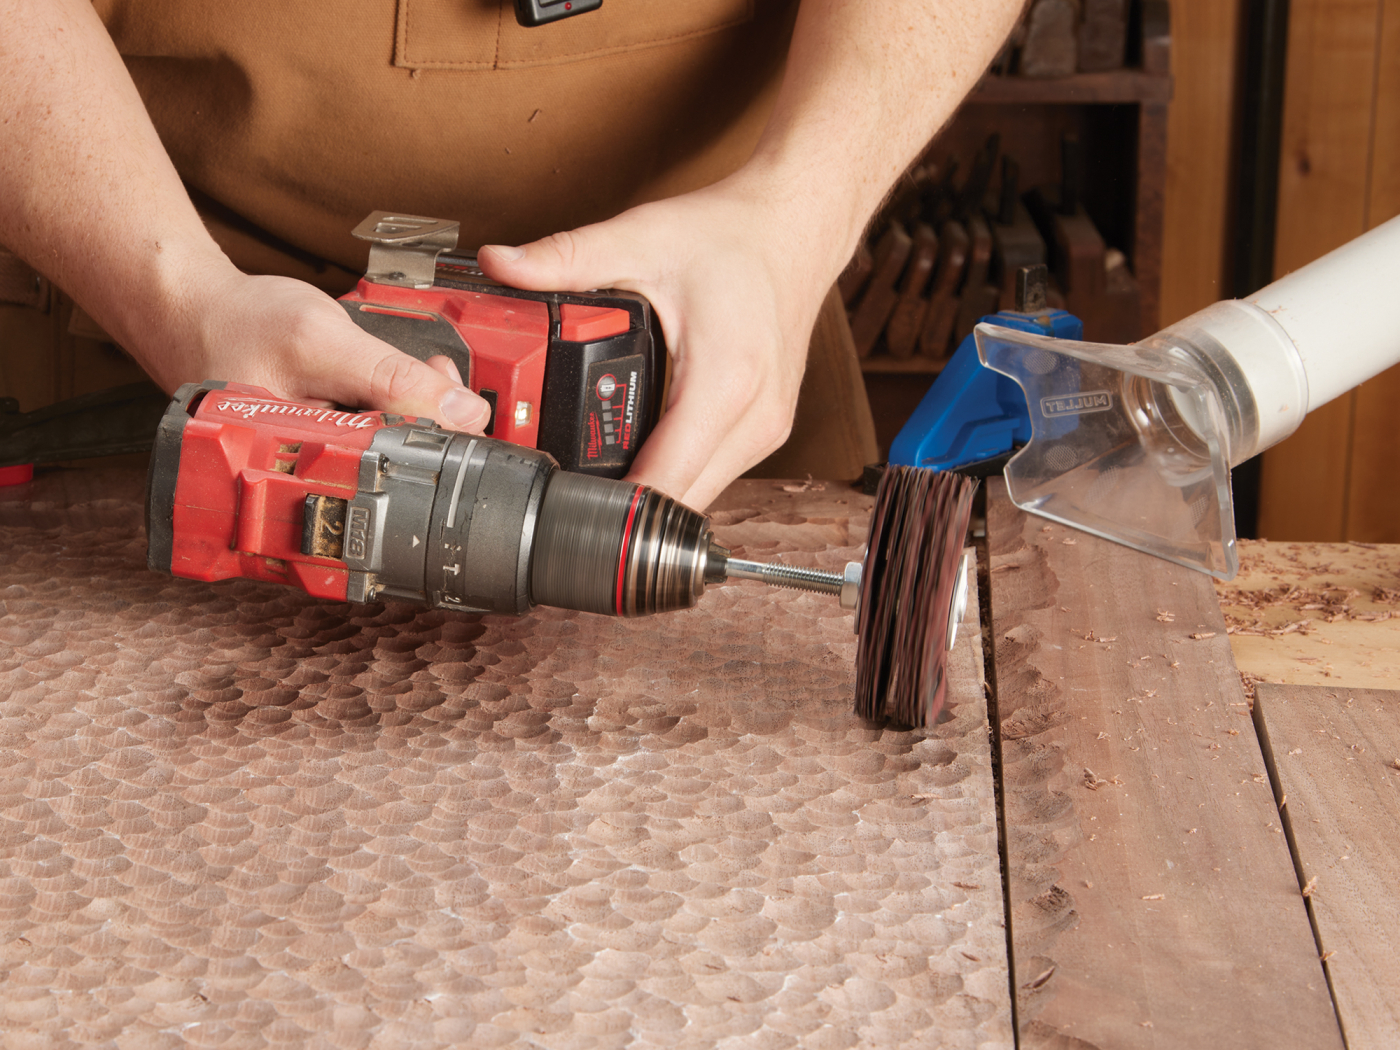
Texture application employs an Arbortech Ball Gouge (30mm) on the Power Carving Unit—a depth-limited spinning blade for controlled carving. Though time-intensive, the process yields rewarding results. Focus on randomness: lightly tap the surface variably, revisiting flats highlighted by chalk. Smooth fuzz with a flap disk in a drill, preserving tactile depth for future exploration.
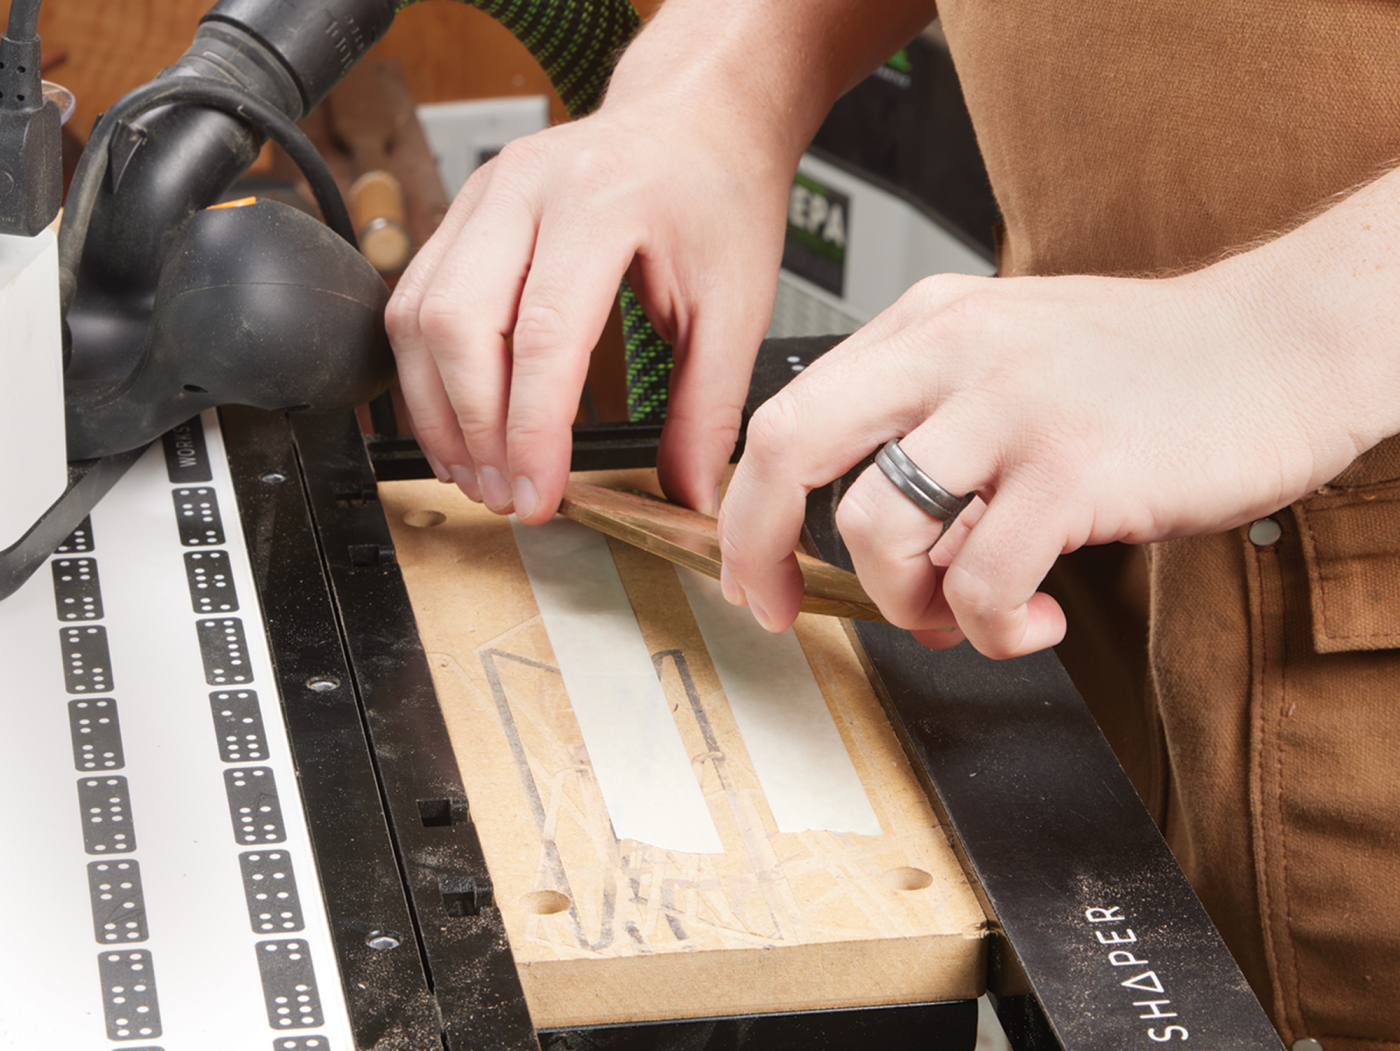
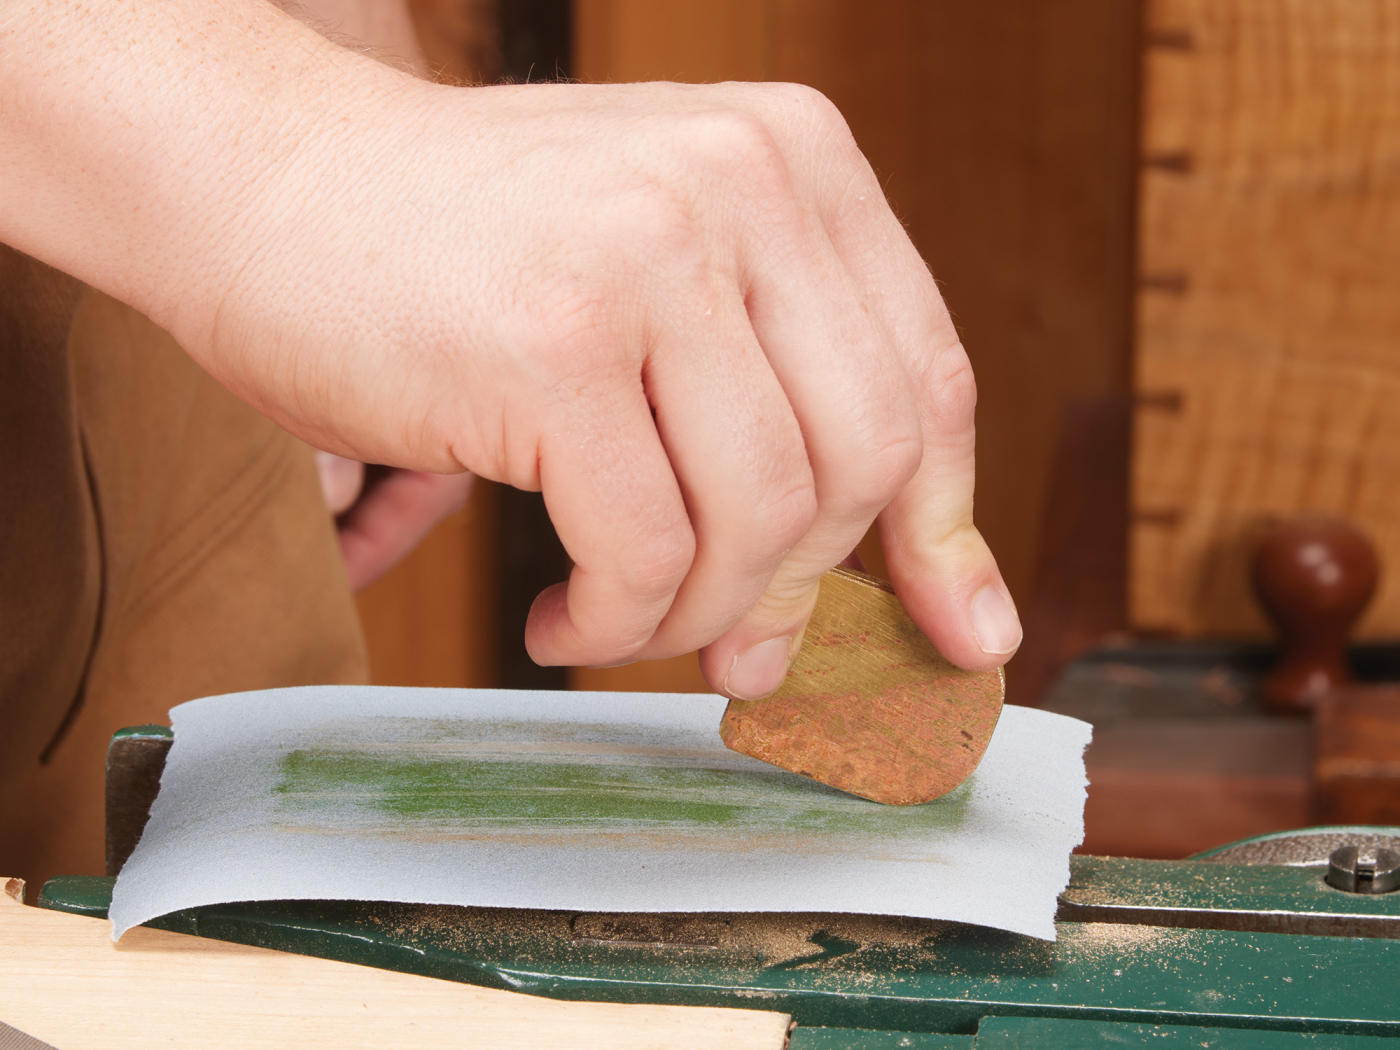
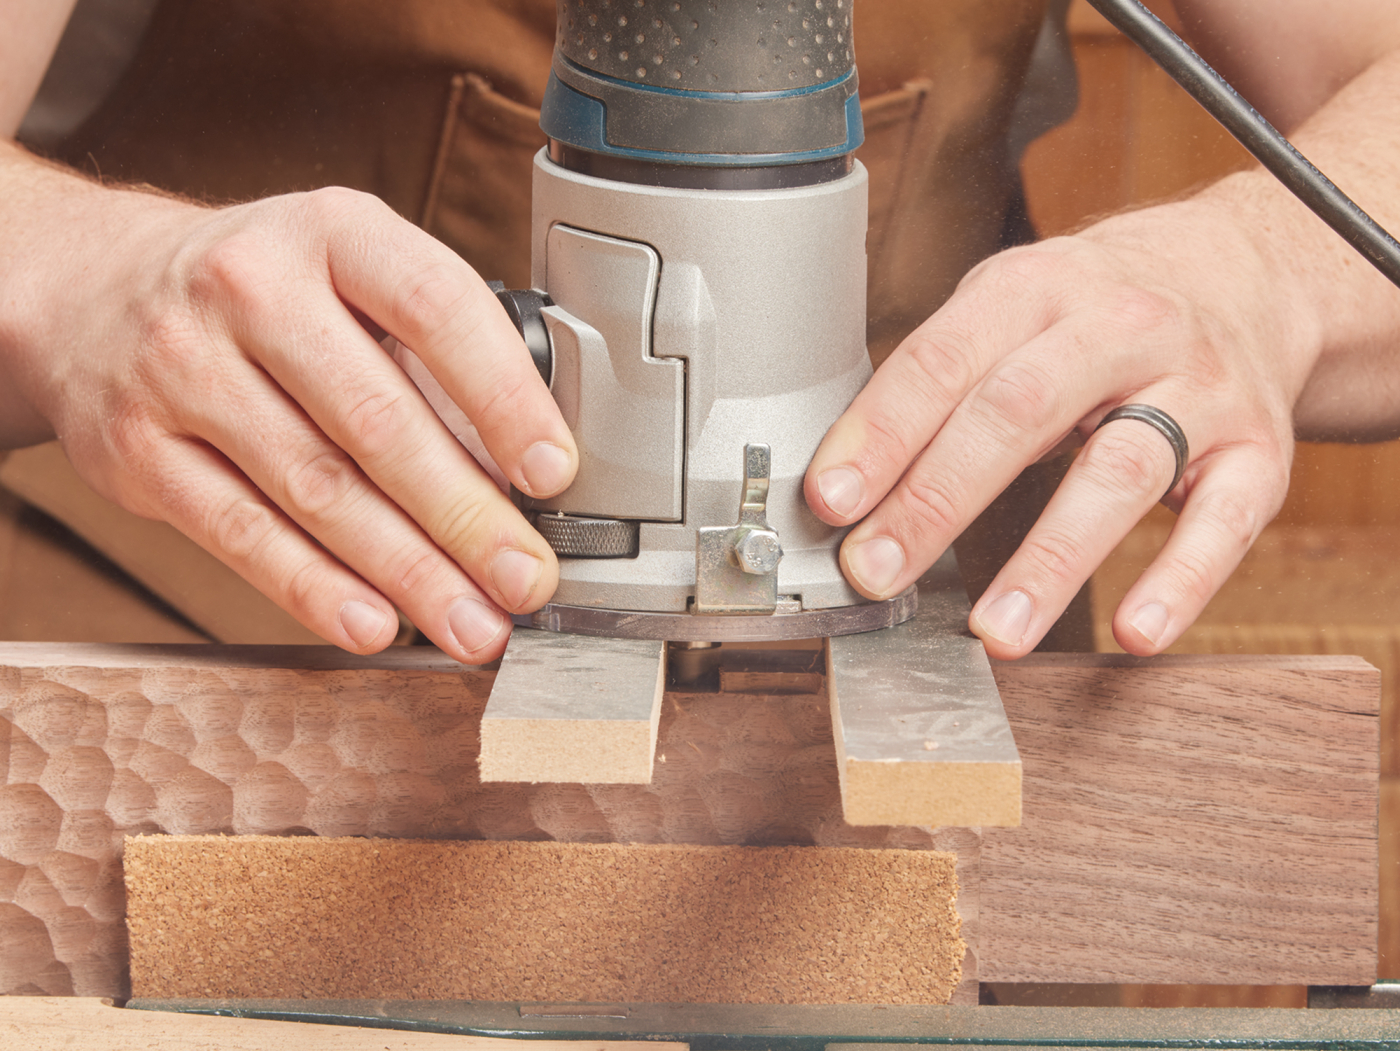
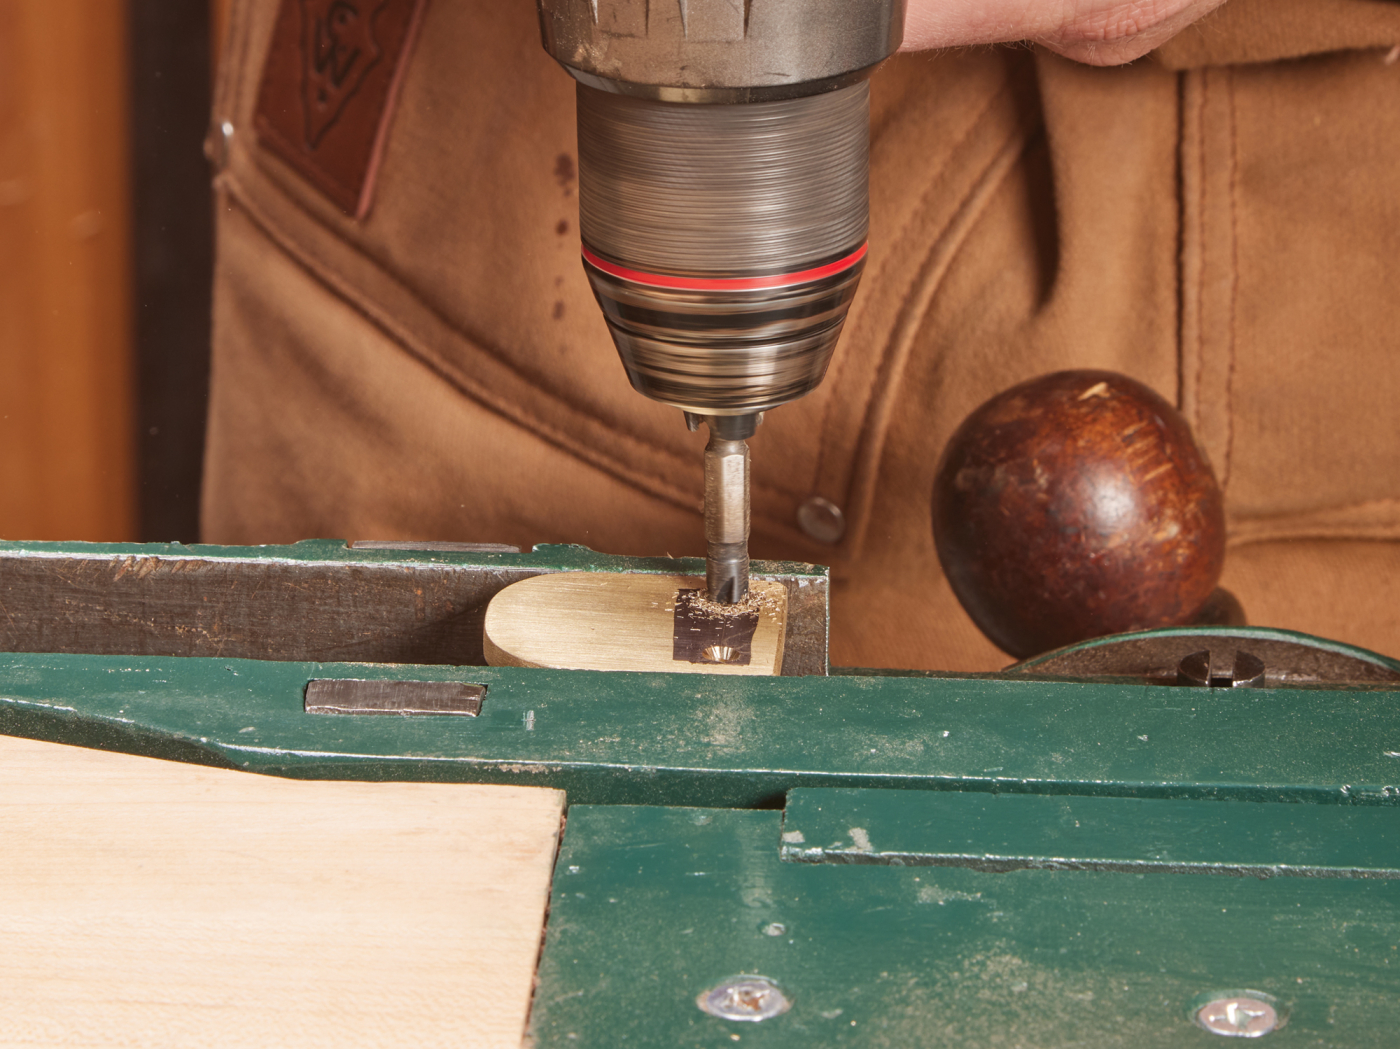
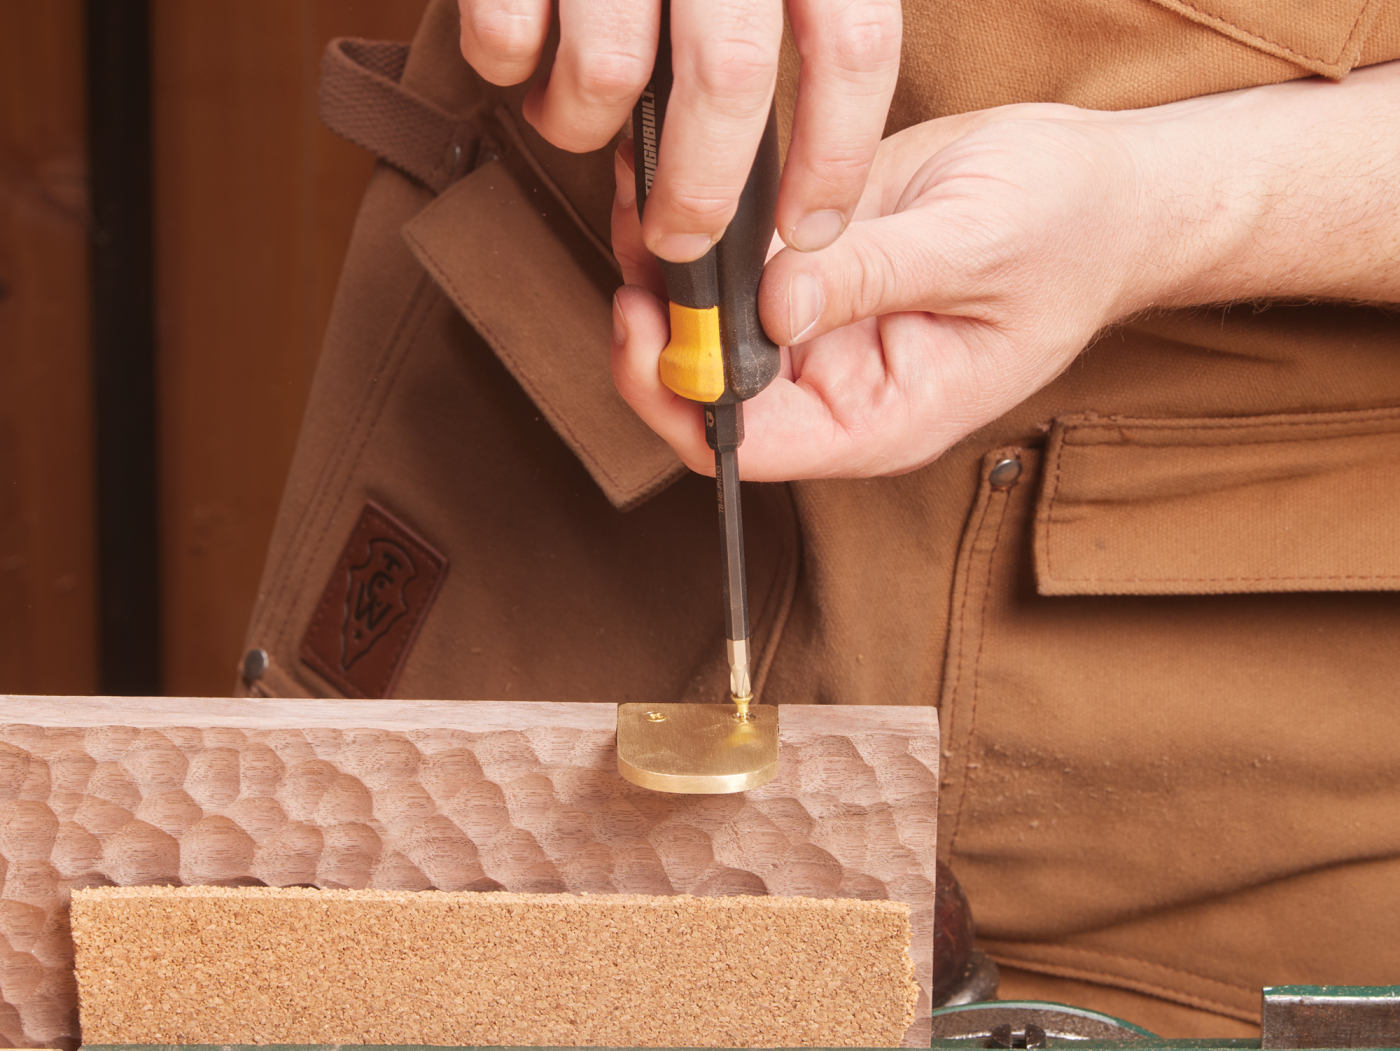
An integral wood pull was initially envisioned, but a minimalist brass tab proved more harmonious. The Shaper Origin cut the shape from brass sheet taped to a sacrificial base. Sand to a matte finish, countersink screw holes, and form a door-edge notch via handsaw and router plane. Brass screws secure it seamlessly.
Mount hinges to the case first, slide the door onto pivots, and secure with screws. Complete the piece with a custom Maloof-inspired finish formula applied as base and topcoat.